

“HOW DO YOU KEEP YOUR SKIES LOOKING SO DETAILED AND COLORFUL? MINE ARE SO BLOWN OUT!!”
This is a question I am asked almost daily. Beach photography can be quite challenging because the light is constantly changing and there is usually no open shade to work with. So get ready to unravel the secret to keeping your subjects correctly exposed while also giving those beautiful sunset skies the vibrant colors they deserve!
FIRST, IT’S ALL ABOUT YOUR CAMERA SETTINGS.
It’s highly recommend you learning how to shoot in Manual mode in order to achieve this. If you shoot on Automatic, your camera will decide what your settings should be and as a result, you will most likely get really dark subjects or a blown out sky.
Start with adjusting aperture. As a rule of thumb, you should use a smaller aperture to ensure that the clouds and sky will have enough detail and color. Now, adjust your ISO and SS accordingly depending on the brightness of the sun.
Don’t be afraid of using an even smaller aperture when the sun gets low to let more light into your lens!

BUT HOW DO YOU KNOW WHAT SHUTTER SPEED TO USE?
First, put your camera on spot metering mode. This will allow yourself to adjust the camera settings based on the subject’s skin. Point the lens at the lightest part of the subject’s skin to determine how to adjust the shutter speed to achieve correct exposure.
Now, take all the rules you’ve learned about exposing for your subjects skin and throw them out the window. Yep, you read that right. After your camera tells you that your settings are all correct for perfect skin exposure, purposely underexpose!
Underexposing a bit will keep the color and detail of the sky. Always look at the back of your camera after snapping an image to see if you’re on the right track. Then you can readjust as needed.
NOW FOR THE FUN PART…POST PROCESSING.
This is where your images can come to life. Your SOOC (straight out of camera) images might tend to look like this.
Not so magical, huh?
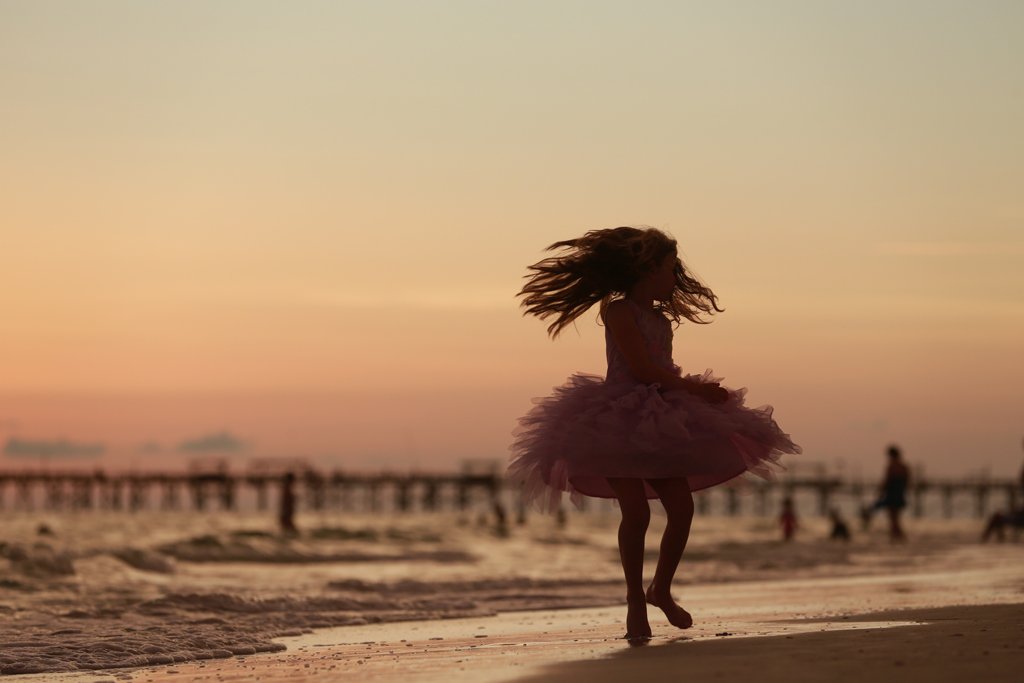
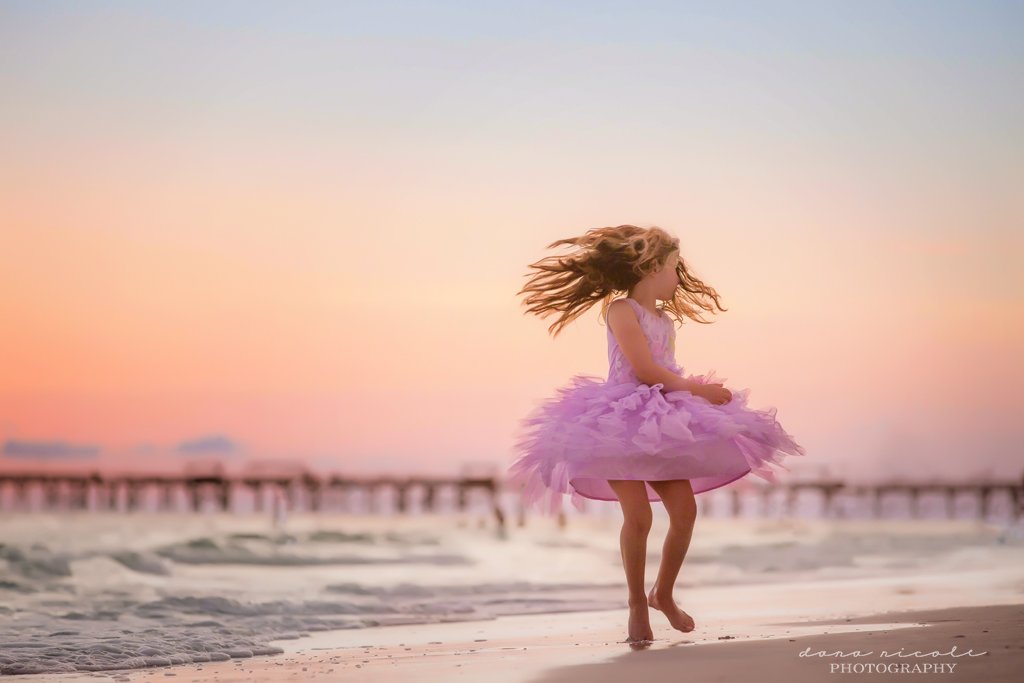
That’s okay, I’ve created this image exactly how I wanted to because I have the final product in mind!
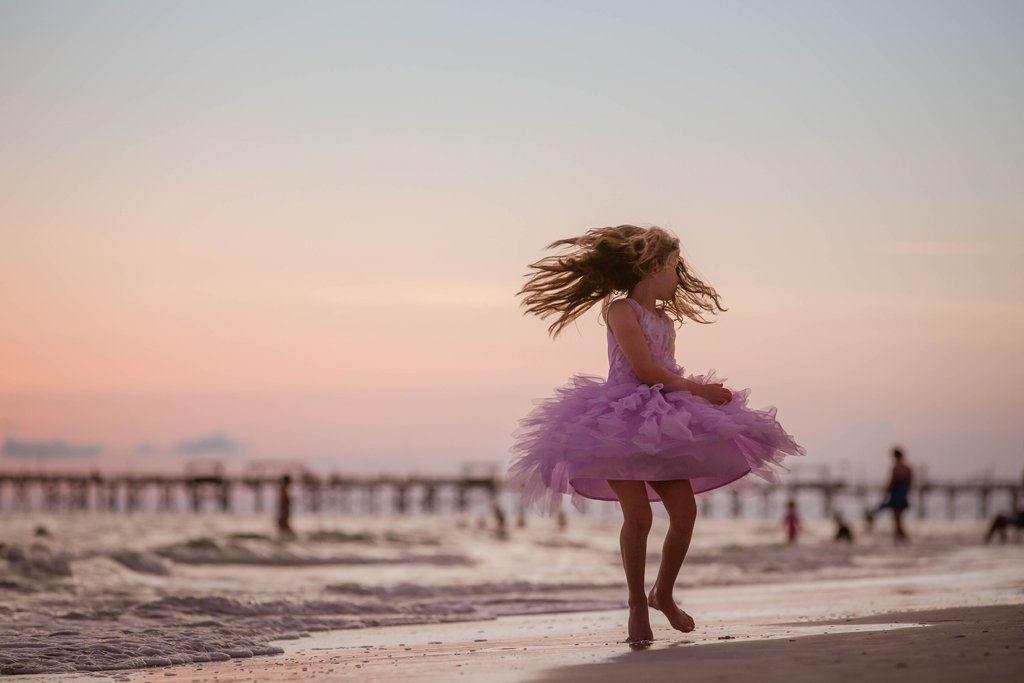
I always bring my images into Lightroom first to make global changes. I usually do the same thing to each image I edit which consists of bringing down the highlights, increasing shadows, adding a radial filter to my subjects, increasing sharpening, and noise reduction.
I also play with the white balance usually by making my images a bit warmer. After I’m done with my LR edit, the image look like this.
NOW FOR THE EXTRA OOMPH THAT I LIKE TO DO IN PHOTOSHOP.
Curves layers in Photoshop are my favorite! I use it to lighten my subjects even more and to darken my sky as well. To do this without messy halos, I like to use the quick selection tool to easily select my subjects only.
After a few more hand edits and a little increase in color saturation, I’m all done!
Alternatively, you can achieve a similar look in Lightroom by using brushes and filters as show below.
Now this may seem like a lot of steps, but a beach edit usually takes me around 5 minutes because I’ve made my own shortcuts.
HAVE ANY QUESTIONS ABOUT BEACH PHOTOGRAPHY? I’M HAPPY TO HELP!! ASK BELOW IN THE COMMENTS AND START THE DISCUSSION NOW!

Dana DiSalvo lives in Tampa, FL with her husband and three daughters. She is a natural light photographer specializing in family, children, and maternity sessions.


be the first to comment