Photography terms: the lingo and language of the photography and portrait world.
I CAN RECALL, PRETTY VIVIDLY, MY VERY FIRST PHOTOGRAPHY CLASS IN COLLEGE.
Here I was, a new and excited student ready to become confident and well-skilled in all aspects of photography.
What led to to my college major was simple: I loved the creative aspect of photography and the breath-taking final results that previous students had created. I knew that this was my path, but I was completely unaware of what I would have to learn to get there.
So, here I am in class, eager to start taking photos and learning all things photography, when the teacher starts talking about shutter speed, histograms, metering, ISO, white balance, and exposure balancing.
My creative mind went blank and past visions of repeated high school math classes filled my mind.
THIS. Math and numbers. This surely cannot be what photography is all about!
Sure enough, it was ( to much of my dismay).
Maybe this all sounds familiar to you???
But now, nearly 15 years later, all of these ‘technical’ terms and aspects of photography have become just another part of my collected knowledge.
Having a grasp of this type of photography lingo will keep you up to speed hen learning something new & trying new skills.
I am sharing the top 10 technical photography terms you should know when you are starting out in your photography journey
(so you won’t be flooded with horrific visions of past failed math exams and classrooms full of foreign number formulas.)

APERTURE
What’s an aperture, and why do I need a lens that has a decent one?
An aperture is a hole or diaphragm in the lens. As a photographer, you will have full creative control of how big or small you make the hold. Adjusting the size of the hole is a measurement that’s called an f-stop.
The smaller the f-stop number (such as f1.4 compared with f22), the larger the hole as the lens can let in more light. This is precisely what you want as a photographer.
The visual effect a large hole in your lens has is the difference between a beginner and a professional. Take portraits as an example, ideally what you want is a blurry background with the person in focus. If you have a lens which is capable of this, you can separate the person from a distracting background.
So when someone says you should get a lens that has a decent aperture they are actually saying: “Look for a lens that has a small aperture like f1.4 as this will be excellent for portraits and make your photos stand out”.
LOOK AT THAT BOKEH!
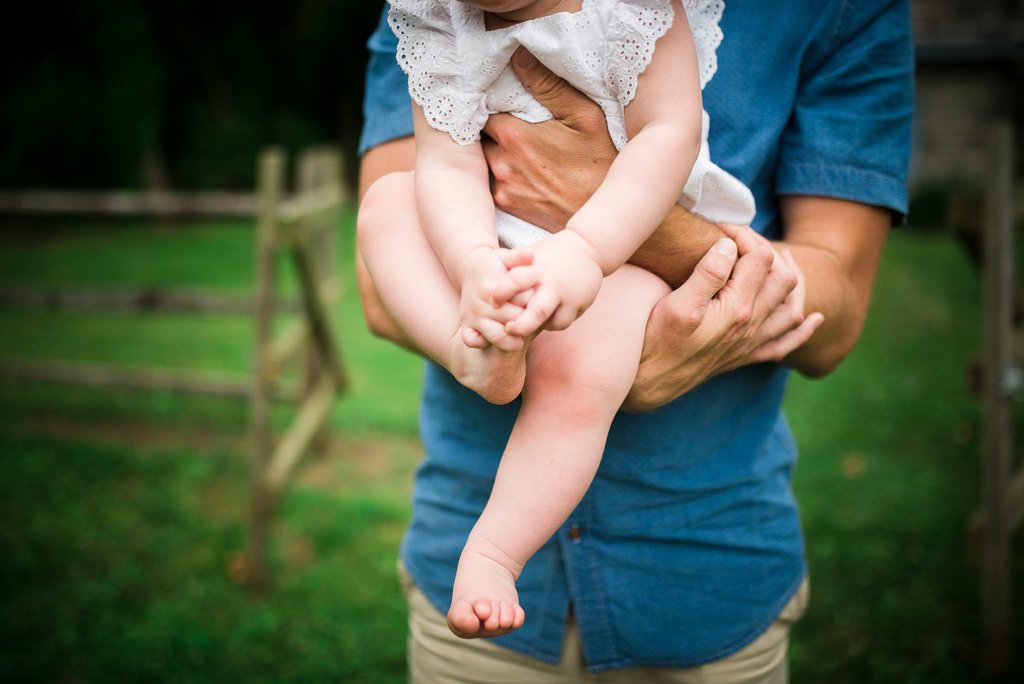
This photography term might be a weird word to pronounce, but easy to understand visually. It’s just a fancy way of saying look at the out of focus areas in the photo. Just like these photos.
When taking into account the technical photography term above, it is right to say a decent aperture produces excellent bokeh.
Read next: 4 EASY WAYS TO GET A BLURRY BACKGROUND IN YOUR PHOTOS

FOCAL LENGTH
A focal length is a distance measured in millimeters between the sensor and the rear glass element of a lens. This measure is the technical explanation, so what does it mean in simple terms?
In simple terms, all lenses contain a ‘number’ followed by ‘mm’. Some examples are 17mm, 24-105mm or 400mm. Basically, the smaller the number or focal length (17mm), the more the lens can fit in the photo. The larger the focal length (400mm), the closer the lens can get to the subject. What about the 24-105mm example?
A lens that contains two numbers means you can zoom out at 24mm and zoom in to 105mm. This type of lens is referred to as a zoom lens and allows you various focal lengths in one single lens.
PRIME LENS
Like in the explanation above a prime lens isn’t a zoom lens. It only has a fixed focal length – such as 35mm or `35mm.
Prime lenses generally let in more light as they have larger apertures and this specification makes them more expensive.
It’s common for photographers to debate which lens is best, prime or zoom. At the end of the day though, it comes down to your budget, your photography goals, and your subject.
Either way, it’s not the lens that takes the photo – it’s the photographer!
NOISE
This photography term has nothing to do with actual noise in terms of hearing. No, we are not talking about an audio file embedded in a photo.
Noise is the grain present in a picture.
Think of it like film grain. Sometimes photographers use excessive noise in a photo to enhance the feel of a photo – like a black and white image which needs to show more contrast. However, the majority of the time noise is something you want to avoid.

(photo taken at ISO 9000 – notice the immense amount of noise in the shadows and more blurred areas)
To lower the amount of noise in a photo, you need to reduce a setting referred to as ISO. Adjusting the ISO to a lower number like ISO 100 makes the sensor in the camera less sensitive to light. Daylight environments have enough light and can, therefore, get away with a lower ISO of ISO 100. Low light scenes are entirely different.
To photograph in a dark room with few lights, you should change your ISO setting to ISO 800, ISO 1200 or higher. At these higher ISO, your photos can begin to contain more noise than pictures at ISO 100.
BURST MODE
Burst mode has nothing to do with your camera exploding. Instead, it refers to continuous shooting mode.
Did you know your camera is capable of taking multiple shots when you hold down the shutter button? The number of shots is measured in frames per second (fps) or another way of saying it is photos per second.
Typically entry-level cameras have a lower fps than more expensive cameras. For photographing sports and wildlife, 10 fps is a good starting point.
EXPOSURE COMPENSATION
Exposure compensation is one of the few technical photography terms that explains itself! This camera adjustment can either increase or decrease the exposure of a scene before taking a photo.
Think of exposure compensation like this, when it’s bright outside you wear sunglasses to adjust the exposure so you can see. With a camera, you do the same by compensating for your exposure.
Simple, right?
SHUTTER SPEED
Shutter speed is quite the technical photography term. This setting has everything to do with timing. On your camera, you can adjust the amount of time the camera takes while taking a photo.
You can either have a slow shutter speed or a fast shutter speed. All cameras measure shutter speeds in seconds. A longer shutter speed will blur movement whereas a fast shutter speed freezes action in time.
When someone says you need a faster shutter speed to capture children running and playing, they mean to set your shutter speed faster to freeze the action, so there is less blur.

WHITE BALANCE
Let me attempt to explain this the most straightforward way.
There are many different types of lights. All of them produce a distinct coolness or warmth with regards to their color temperature. Sometimes when you get a mix of lights, the camera misaligns and gets the colors wrong.
White balance in your camera aims to reset the color white as white.
All cameras have different white balance presets such as indoor, cloudy, daylight, shade. If you find yourself with a strange orange color cast when taking photos, try adjusting your white balance to a preset that’s suitable for the environment you are photographing.
You can also adjust white balance in Lightroom.
RAW FILES
RAW photos are a different type of file format. Think of this photography term like it’s name: RAW. Unbaked. Uncooked. Not done.
When you photograph in RAW, you are bypassing the cameras program to add color, saturation and compression to the image file. As a default, your digital SLR or mirrorless camera records an image as a jpeg file.
If you want to record the highest quality, shoot in RAW.
That way, when you edit, you can adjust the way your photos look without losing quality. The easiest way to modify your RAW images is with Lightroom Presets.
Using presets is an easy way to change the look of your photo with a click of a button – here’s where you can get started.

be the first to comment