


Can you really take AMAZING DIY family photos yourself? WITHOUT a professional photographer???
Why yes. Yes you can.
If you happened to wait to the last minute to find a family photographer on your timeline or perhaps it’s just not in the budget this year, then knowing a few tricks for taking your own DIY family photos will come in handy.
As a professional family photographer with over 10 years of experience, I have witnessed and gone through pretty much every circumstance.
I know the things that should be focused on and planned for, and the things that you really don’t need to spend your precious time and energy on.
Taking on your own DIY family photos can be a fun adventure if you allow it to be. But, if you’re a perfectionist who’s aiming for high quality and professional like photos, then it’s going to be a little bit more extensive.
But, if you have a camera, a phone, and the willingness to make it happen , then you can absolutely make this work!
There are just a few things to keep in mind and plan for BEFORE you set out to take your own family photos (and hope to succeed with them).
Equipment needed for DIY family photos
You don’t need to go out and buy a new camera in order to take great family photos. I am a HUGE advocate for using what you have on hand and rocking it.
Whether it’s a smartphone, a mirror-less camera, or an old DSLR that rarely gets touched, you can use what you have on hand to take great photos. YOU DON’T NEED AN EXPENSIVE CAMERA TO TAKE GREAT PHOTOS.
You just need to know HOW to use the gear that you have in order to get the best results. If you practice enough ahead of time, you will be more than capable when it’s time to put on the big show.
The only things that I really recommend for making this the easiest DIY photo session are a tripod and a camera remote. Remotes are really cheap and they will make your life so much easier – much easier than putting your camera on a timer and running into position.
As for a tripod, I recommend investing on this piece of gear.
After all, this piece of equipment will be holding up your precious camera, so don’t skimp on a tripod.
It always astounds me when photographers invest in thousands of dollars worth of gear but then look for the cheapest tripod. Do you really want to rely on something cheap to secure your gear???
So depending on the type of camera you have, pick an appropriate type of tripod for the worth of your camera. For example, if you are using a $500 camera, don’t reach for a $20 tripod. Sure, you might save a few bucks, but if it gives out and breaks your camera, well, now you’re in a pickle. If it helps, this is the one that I recommend.
Choosing the BEST location for your family photos
Locations aren’t all created equally.
What you might think would make a great location, might actually be the complete opposite. When it comes to picking the perfect location for your photos, you need to keep one thing in mind: LIGHT.
The location could be the most jaw dropping park in the world, but if it offers poor lighting at the time of day you’re wanting to take your photos, then all the beauty in the world can’t make up for bad light.
READ NEXT: How to choose the best photo session location
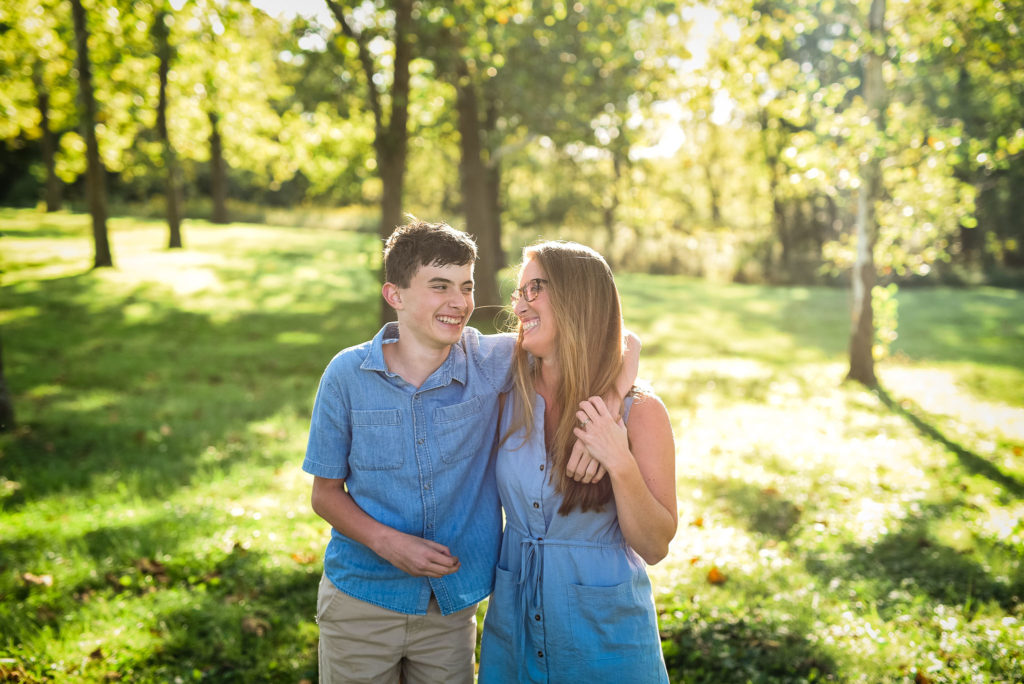
For simplicity’s sake, I recommend choosing a location that offers A LOT of open shade with your backs turned away from the sun. Open shade is when the shade is opened up to the sky. This creates a more soft look on the skin and allows the sky to reflect light back onto your face – giving off a pleasant creamy look and good catch lights in the eyes.

For instance, this was taken in open shade with the subject turned away from the sun. This is important because I didn’t want the dappled lighting hitting his face. The open shade and the light being reflected from the sky provided great light to illuminate his face and bounced it back into his eyes.
You can get even more tips on how to create creamy skin tones here.
The best time of day to take your DIY family photos
If you are wanting to utilize natural light and not have to worry about harsh shadows on your face, then taking the photos during golden hour is your best bet.
Golden hour is that magical 1-2 hours during the day when the light is low and very golden. Golden hour provides you more flexibility in choosing your location, especially if you don’t have a lot of shade to work with.
You have 2 opportunities per day to take advantage of golden hour: once in the morning and once in the evening. If you have small kids that are awake and happy in the morning, then a sunrise session might be your best bet! But if you have reluctant teenagers or people who don’t love mornings, then opting for dusk is what you should aim for.
If you can’t make golden hour work, then choosing a location with lots of shade will be just as good.
If there is ever an instance where I cannot make a sunrise or sunset session work, then I personally love to go to urban locations. The tall buildings not only provide a ton of shade, but the pavement and concrete ground make amazing natural reflectors that help skin tones look their best.
While I LOVE taking photos among trees and wildlife, urban areas are probably my favorite because of the way they make my subjects look (not to mention how much EASIER it is to edit these types of photos).
How to edit your DIY family photos
Now that you know what gear to bring along and what types of locations to look out for, now you just need to take the photos.
Before we dive into my best tips for taking awesome DIY family photos, it should be said to have your end goal in mind.
The type of lighting, the location, the colors, and the final look to your images will pull your entire vision together. You can finalize your end look with your photo editing.
But, do you really need to edit your photos?
Some photographers will argue that there should be no need for editing photos if you get everything right in camera. That it’s your job – and your camera’s job – to get the finished look without relying on editing at all.
This couldn’t be further from the truth.
In all honesty, editing IS what puts the professional touches on your photos. If you allow your gear to take all the best settings and color rendering, then you are missing out on a HUGE opportunity to take your photos a step further.
Instead of viewing editing as a crutch and a way to fix bad photos, view it as a way to enhance your work instead. Editing shouldn’t be relied on for fixing bad photos, but making your photos look their best. And you can EASILY achieve clean, simple, and even artistic edits in Lightroom.
If you’re new to photo editing, I recommend keeping it simple and using Lightroom presets.
Presets are recorded editing steps that you can apply to your photos and edit them in 1 click. We have many options available for all versions of Lightroom.
For $10 a month, you can use Lightroom – arguably the most diverse editing software – to organize and edit your family photos. It’s a small price to pay to have your photos looking their best.
And if you’re not sure Lightroom is right for you yet, then download their free phone app. You can use mobile presets to instantly edit your photos. Although it’s not as simple as using it with your desktop, it’s another easy option o have at your fingertips.
Check out my library of Lightroom tutorials on the blog if you want to learn more about Lightroom editing.

Before and after using our Life in Color Presets for Lightroom: a 1-click edit that polishes and adds vibrancy to color!
Now that we got all of the basics out of the way, we are ready to start talking about the best tips when it comes to taking your own family photos.
Keep in mind that I am a professional and that I also take my own family photos (and have done so for over 12 years now).
I have had A LOT of time and opportunity to hammer down what’s important – and what’s not – so that you can take the best DIY family photos.
Let’s get started!
Choose your family photo outfits
First things first. What in the world should you wear for your family photos???
If you plan on using these photos to decorate your home, then I highly suggest choosing a color palette that will compliment your home.
If your house is full of soft muted tones, you probably don’t want to dress up in neon colors. If these photos end up going up on the wall, will the colors (along with the location) go with your home decor?
Aside from coordinating with your home colors, I highly suggest to steer clear of a few wardrobe no-nos:
- No white shirts. The are highly reflective and BRIGHT, so they will take the viewers eye instantly to the white color and not the subject.
- No matching outfits. We are well past the 90’s and that trend can stay there.
- No graphics or words on clothing. It screams cheap and is very distracting.
- No “loud” prints and designs on your clothes. It’s not your closet’s photo sessions, it’s yours.
- Nothing super trendy. If you look back at these photos in 20 years, will you be smiling or will you be burying your head in embarrassment.
Overall, choose clothes that you adore & represent your own style and personality. You should love the way that you look in your photo session clothes!
Prep your family photo gear
As mentioned earlier, it’s best to know ahead of time what kind of gear you are going to bring along. But, it’s also worth mentioning to prep your gear ahead of time.
Make sure your batteries are charged and ready to go. Double check for memory cards (and have a backup in case one goes faulty).
If you are using a timer, have your timer settings ready to go ahead of time so that you aren’t trying to figure it out on the spot. I recently had this happen to me and not remembering how to adjust my settings, it made for a chaotic moment while I figured it out with my kids running amok.
Overall, just come ultra prepared and I promise it will run more smoothly.
Be mindful of light
Even though I mentioned this before, it’s worth mentioning again (because it’s THAT important).
Light will either be your best friend or your worst enemy, so make sure that you pay attention to where the light is before you start snapping.
The worst thing that you can do is stand in the sun and everyone be squinting from the light. To avoid harsh shadows and a nightmare editing session, turn your back against the sun to prevent displeasing light and squinty eyes.
Need more tips on how to use natural light to your advantage? Grab this natural lighting guide & start to understand how to make ANY type of natural light situation work for you!
Get photo ideas ahead of time
Having your gear and lighting situation planned ahead of time is great, but you should also consider what types of photos you want to capture as well.
Are you wanting something more posed? Candid? Lifestyle? Maybe a mix of both?
Doing a little bit of research ahead of time will help you in the moment to take better photos.
Scour the internet or get some ideas from your favorite photographer ahead of time and aim to re-create some of those poses.
Be mindful of groupings and how tall (or short) everyone in is. Try to group everyone in a way that doesn’t cut off heads of make others seem out of place. It might take some re-arranging, but it will be worth the end result.
Keep your family’s personalities in mind
In order for your own session to run smoothly, keeping your loved one’s personalities in mind is a must for great photos.
If you know that you have a toddler that will not sit, then come prepared with a few tricks up your sleeve for them to “cooperate” so that you can get the shots that you want.
If you have an older child that gives you the stink eye, then make sure what’s at stake for this session. I always like to remind my kids that the session will go MUCH FASTER if they buckle down and do what Mom wants. The more they goof off, the longer it lasts.
READ NEXT: How to take amazing photos of wiggly toddlers that run from the camera
The biggest perk of taking your own photos is that YOU know your family the best. So use it to your advantage to get some great photos!
Lower your expectations
This one took me years to understand and fully appreciate. But, doing so, it has led to more satisfying results.
You see, as a professional photographer, I used to always go into my own family session with a vision. I knew what kinds of “poses” and groupings that I wanted, the type of light that I craved, and the overall energy that showed in the photos. I would even imagine the expressions on my kids faces.
But, when those visions didn’t come to fruition, I would become extremely disappointed. Even mad about it for days.
How crazy is that?! They are only pictures!
The funny thing about it too is that I would turn back to theses photos a year or 2 later and LOVE them. You know why? Because I will never get those moments back – and even though they didn’t live up to my vision in that moment, they perfectly depicted our lives at the time being.
If you go into your session not expecting anything, and then being pleasantly surprised with the outcome, it will be an overall much more pleasing experience.
TRUST ME.
Offer up rewards to younger participants
As a Mom of 4 and a family photographer by trade, I am not one to be against bribes. Sometimes, that is what it takes to get the job done (and the job WELL done).
Little kids not smiling or having fun? Offer up a lollipop, donut, or their favorite special treat. If they are like most kids, you’ll be able to see their mood quickly improve!
Just make sure that you know their cues though. You don’t want to offer a special treat too soon or too late.
Too soon and they will lose enthusiasm and possibly not do the best job for all the photos. Too late, and you might miss some good photo opts.
Take lots of photos
When you take your own family photos, too much is not even in my vocabulary.
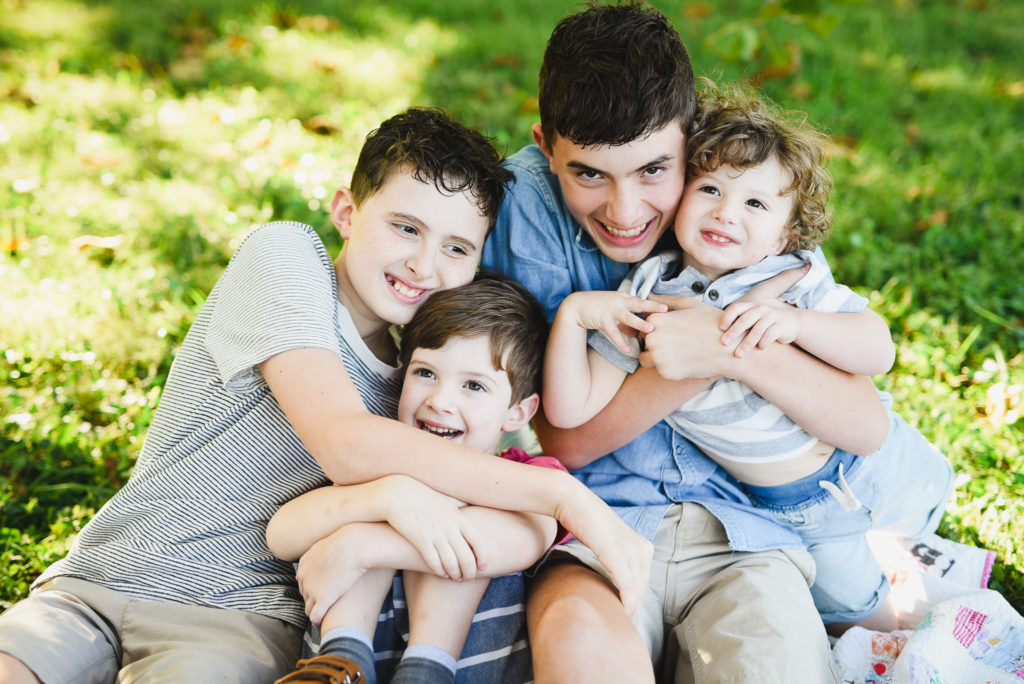
Since I like to take more candid style photos, it’s a good idea to capture many photos so you have a good volume to choose from. If someone has their eyes closed in one, they likely won’t in the next.
This is why using a timer or remote will be your best friend. It might seem overwhelming to comb through hundreds of photos, but at least you will have more picks to choose from, right???
Use prompts instead of heavy posing
I won’t lie: being the photographer AND the subject simultaneously is not easy. It can be hard to get everyone lined and up perfect before the timer goes off. Then to add yourself into the mix without knowing how you fit it makes it an even bigger challenge.
For this reason, I personally like to use prompts instead of heavy poses. Giving your subjects an activity to do instead of “stand, look, smile” will result in better expressions and a happier experience.
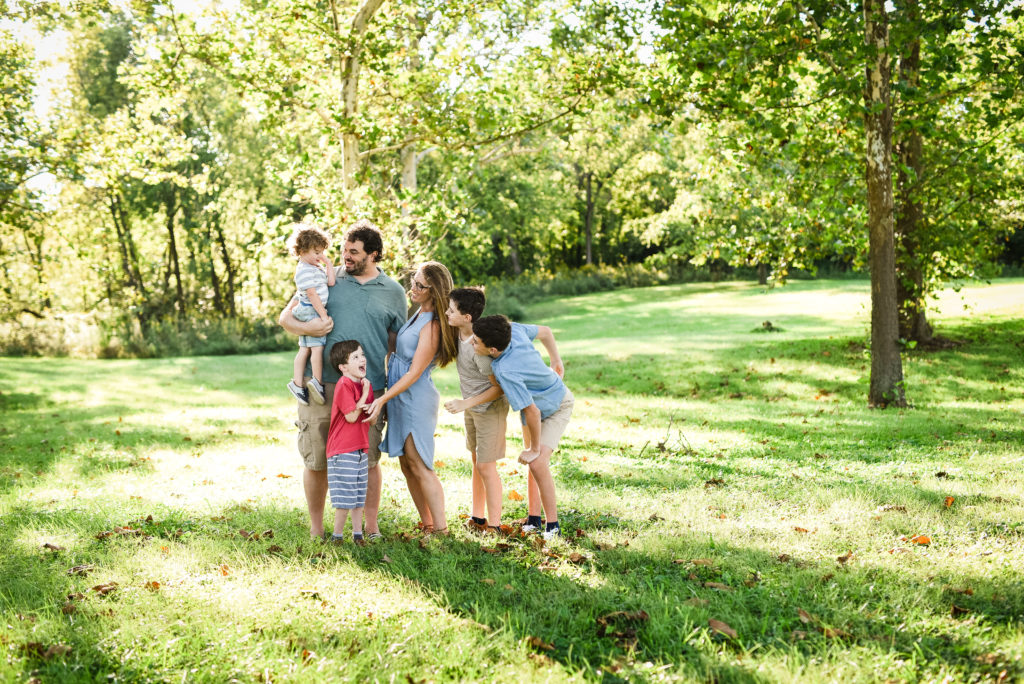
For this photo, I gave everyone a general idea on where to stand and what to do. While I was rushing back to the scene from setting the camera remote, I told everyone to smile and look at the baby.
My 6 year old was giving me a glare and not doing what I wanted to I reached down and gave him a tickle that turned his frowny face into a smile. Overall, it turned out pretty good for not giving too much direction and recovering on the fly.
Prompts take some work and a lot of ideas ahead of time, so it’s important to know what you’ll try BEFORE you start taking photos.
Grab our children prompts to download and take with you to your next family photo outing.
Know when to wrap up your DIY family photos
This one tip will take you far.
Planning your own DIY family photos is not a small task (especially if you do a lot of planning), so you want to give it your all to get the best photos.
But at the end of the day, there will only be so much gas in your tank and in your loved ones too.
Be mindful of how much effort you have poured into it and assess moods throughout the duration. You won’t be getting any noteworthy photos of your family if everyone is done and grumpy. And trying to force them to press on will only sour the mood even more.
For me, I want this to be a quick, painless, and pleasant experience. I don’t want my kids looking back to these family photo sessions with anger or remorse. I want them to have a positive experience branded in their mind instead.
And if things just don’t go your way, then look at it as opportunity to think of different ways to make it work next time. There are always lessons to be learned!
Nobody becomes the best family photographer after one go. It might take several attempts or even years to get a good feel of these DIY photo sessions. So, don’t beat yourself up if things don’t pan out the way that you want.
And who knows, you might even look back at these photos a year from then and love them even more.
You will never know until you try it out.
If you enjoyed this post, you might also like:
Take better portraits & learn how to get creamy skin tones.
Learn how to get blurry backgrounds in your images.
Keep these tips in mind to help you edit like a pro.
RAW Vs. JPEG, what’s the big deal with RAW photos?


be the first to comment