


If you want to edit photos like a pro, then there’s a few key factors to consider.
For one, photography is highly subjective. Meaning, whatever I am about to share with you shouldn’t hold too much weight, as different photographers can interpret what’s “professional” and what’s not.
Just because I have been a photographer for over a decade doesn’t mean that you can’t follow your own “rules.”
Photography rules are more like guidelines, so don’t be too hard on yourself if you don’t end up following them to a T.
Secondly, photo editing can be a creative & fun way to bring your images to life and result in the style you desire.
The #1 way to edit better
While this doesn’t pertain to editing alone, getting your camera settings right in-camera is the #1 thing you want to focus on.
First of all, editing should only be used as a way to enhance your photos.
Editing should never be used to fix a BAD photo.
If you’re using editing as a way to fix mistakes, then learning how to avoid those mistakes will make editing A LOT easier.
Getting it right in camera
To make your life easier, and your edits better, choosing the perfect camera settings is a must.
If you have bad lighting, poor focus, and off white-balance, then the editing is going to take longer than it really should.
This is how I am able to edit all of my photos sessions in an hour or less – because of my camera settings.
This might take time and practice, but once you learn how to nail your camera settings, it will become second nature.
When you can successfully produce flawless images in camera, editing will become easier for you.
No matter what, you should be having fun editing your photos and not editing them in a way because someone told you so.
But, this can quickly lead to over-editing which can result in your photos looking over-processed in a not-so-good way.
This is what separates the pro edits from the amateur edits.
You see, pros often use subtle changes in their editing to bring out the best parts of their image. They know exactly what should be adjusted and what doesn’t need to be.
Beginners, on the other hand, can be a bit more eager to try ALL THE THINGS for every single photo that they edit. (been there, done that)
Even though we can’t determine what is right and wrong in a photograph because of it’s subjectivity, there are a few simple “no-nos” when it comes to photo editing to help you avoid editing mistakes.
LET’S GO OVER A FEW OF THE MOST COMMON EDITING MISTAKES SO that YOU CAN edit photos like a pro.
ARVE Error: src mismatchurl: https://www.youtube.com/watch?v=zRK2vna4r9I&t=2s
src in: https://www.youtube-nocookie.com/embed/zRK2vna4r9I?start=2&feature=oembed
src gen: https://www.youtube-nocookie.com/embed/zRK2vna4r9IActual comparison
url: https://www.youtube.com/watch?v=zRK2vna4r9I&t=2s
src in: https://www.youtube-nocookie.com/embed/zRK2vna4r9I?start=2
src gen: https://www.youtube-nocookie.com/embed/zRK2vna4r9I
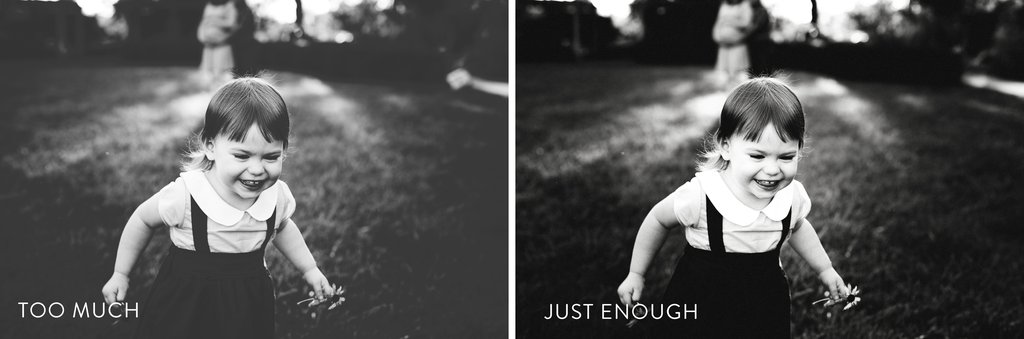
Be mindful of your matte
If you’ve been in the photo industry long enough (or even if you’re new) you probably are very aware of the trendy ‘matte’ look.
This is achieved when you lift the black curve point in the tone curve and lower the white curve point, making the photo look more flat with less contrast.
And while matte can be done tastefully, it can also be overdone that destructs the overall image quality (which in turn can lead to bad printing).
Instead, try your hand at a lighter matte look with a bit of contrast to give your photos more dimension that will be easier to print.
If you love the matte look and want to edit more like a pro, check out this video to show you how to do it without overdoing it.
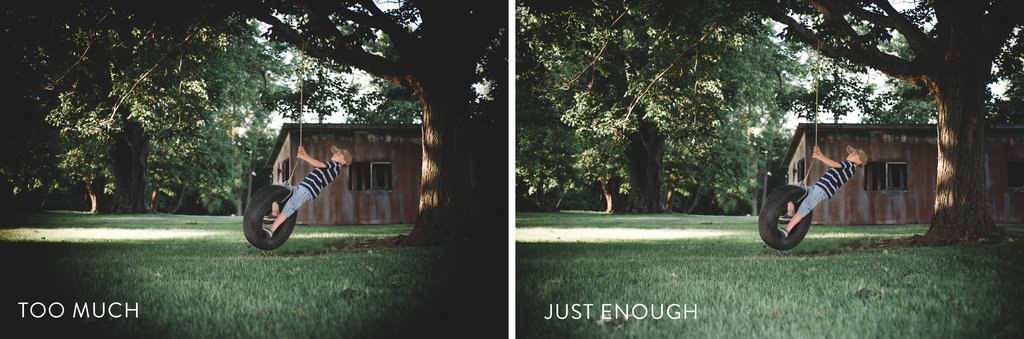
don’t overdo the VIGNETTES
I LOVE vignettes and use them all the time.
Why?
It adds dimension, depth, and contrast and brings the viewer towards the center & main subject of the photo.
Overall, a subtle vignette can greatly improve the look of your image and really bring it to life.
But, just as they can greatly improve the looks of an image, they can also greatly destroy the looks of an image when overused.
Plain and simple, take it easy on the vignette to add just the right amount of editing to your photos.
OVER-ENHANCING EYES?
This can be such a temptation in portrait photography and one of the more common editing mistakes I see in beginners (myself included!)
There is a very fine line when it comes to enhancing eyes to make them pop – and it’s a line you must pay attention to.
This is easily one of those things that can be overdone with the lightest hand, so it’s essential to train your own eyes to be able to discern when too much is too much.

All it really takes is a simple sharpen and dodging to help those peepers stand out, any more retouching can lead to an inhuman look, which if that’s what you’re going for okay, but it’s typically not an everyday look.
Check out this tutorial on how to enhance eyes without overdoing it.
Watch out for OVERSATURATed COLORS
I LOVE color, and if you stick around here long enough, you’ll notice a lot of the photos I create burst with color.
But just with anything else, too much of anything is often a bad thing.
And this rings true for color saturation in portraits. Too much color can quickly lead to your photos looking amateur and tacky really quick.
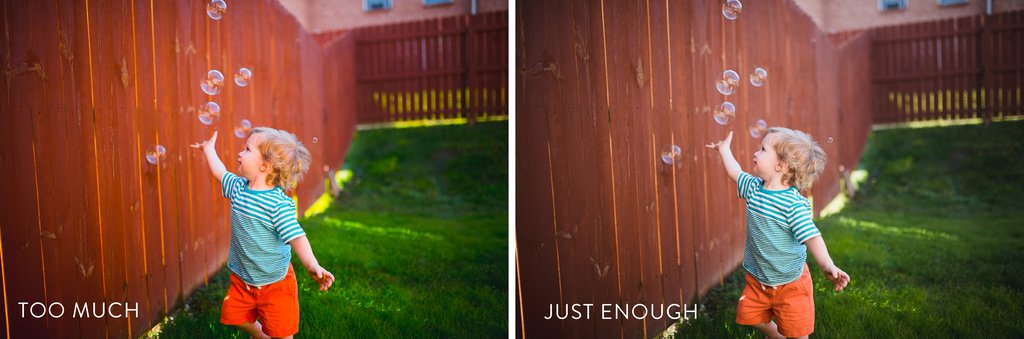
Instead, try a lighter hand on color, or just apply it in the right places with brushes.
Using brushes to colorize certain parts of your photos can help you achieve the look you’re going for without editing the entire photo (mainly the skin) and making the colors too intense.
Here’s 4 ways that you can add color to your photos without overdoing.
The LIFE IN COLOR PRESETS CAN HELP YOU ACHIEVE THE COLOR LOOK WITHOUT GOING CRAZY.
Say no to UNNATURAL SKIN TONES
It might be trendy right now in the world of digital photography, but say ‘NO’ to orange and yellow skin tones.
Unless you want your subjects to look like oopma loompas, then stay clear of this editing mistake.
This happens a lot because of various filters and presets used to change the colors of the photo. Unfortunately, it also changes the color of a natural looking skin tone into something that looks like you overdid it on the sunless tanner.
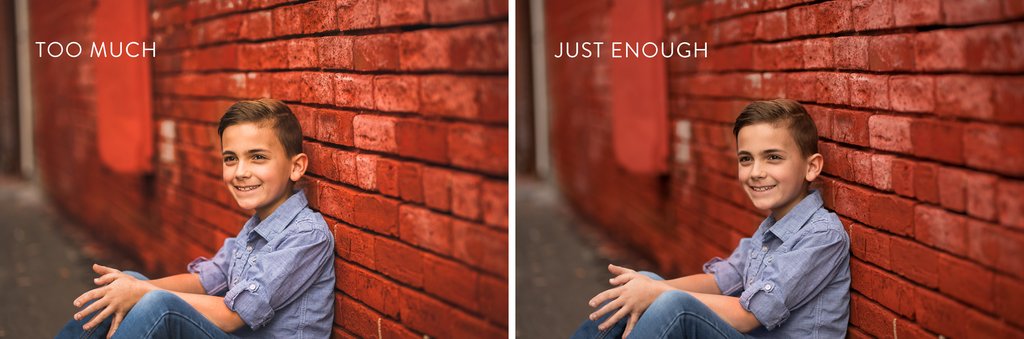
Using brushes instead of filters to change the colors of your photo is a start when aiming for a more trendy look.
This will help you achieve the style you desire without compromising a flattering complexion.
IF YOU’VE BEEN STRUGGLING WITH THESE COMMON PHOTO EDITING MISTAKES, THEN YOU AREN’T ALONE.
Most photographers find their true style and professional editing look over time by making mistakes and learning how to avoid them in the future.
You can learn to adapt too by being selective of your editing workflow and choosing carefully crafted editing tools that will help edit like a pro.
If you found this blog helpful, you might also like:
Take better portraits & learn how to get creamy skin tones.
Learn how to get blurry backgrounds in your images.
How to interact & photograph shy kids + download the FREE posing guide.


be the first to comment