One of my favorite looks to portrait photography are those beautiful, creamy skin tones.
Skin that looks bright, youthful, and fresh.
Recently, I’ve been making a bigger effort into asking my photography clients why they chose me as their photographer. Not only does this help me understand my clients better, but it also helps point out what makes me stand out from my competition.
One of my recent clients told me that she fell in love with my images because of how everyone’s skin looks amazing.
She said that the colors, the light, and the skin all tied in to her decision to hire me, even though I was a bit higher priced than others she has used in the past.
At that moment, I knew that having a signature photography style is important. Not just for us as artists, but also for our clients.

Creamy skin tones are one aspect of that style.
Creating images that help make my clients look and feel their best is my top priority. As such, learning how to create creamy skin tones has been the top of my learning list as a photographer.
I get asked a lot by photographers in my Facebook group how I create these types of photos, so I thought I would explain in greater detail here.
What are creamy skin tones?
It’s that specific look to skin in your portraits. Smooth, blemish-free, healthy, and glowing. The light is even without any harsh shadows, which makes the skin appear more youthful.
Creamy skin tones aren’t just for lighter skin folks, it’s a style that can be created for all skin colors.
The most important aspects when trying to achieve this look are your light and your camera settings. If you don’t have the right settings or the perfect lighting, then your skin tones won’t look creamy and beautiful.
Getting beautiful skin tones doesn’t need to be complicated.
Just keep a few things in mind before trying to get this same look and you’ll be well on your way!
Choose the best light
In photography, light is KING.
If your light quality is poor, so will your images be. On the other hand, if your light is perfection, you’ll get perfect photos (if you have your camera settings correctly chosen that is).
There are many types of light that you can use to achieve this, so being intentional with your subject placement is more important than the actual light source.
Learning to master lighting with subject placement is an art, so don’t get frustrated if your images don’t look the way you want them to yet.
Practice makes perfect and it takes time to get to where you want your skills to be.
Open shade
In my opinion, this type of light is the easiest way to get creamy skin tones. Plus, it’s much more forgiving than other types of light.
You can find open shade just about anywhere, any time of the day, but it’s easier to work with during times of the day when the sun isn’t at it’s peak. The shade of a large tree, building, bridge, or other structure will give you the option for creating creamy skin tones.
You want to place your subject close enough to the edge of the shade, but without having any direct sunlight fall on them. If sunspots end up on your subject’s face, then it will be hard to edit out.
Before taking any photos, turn your subject towards the light to illuminate their face, and then back into the shadows if any direct light is hitting them.
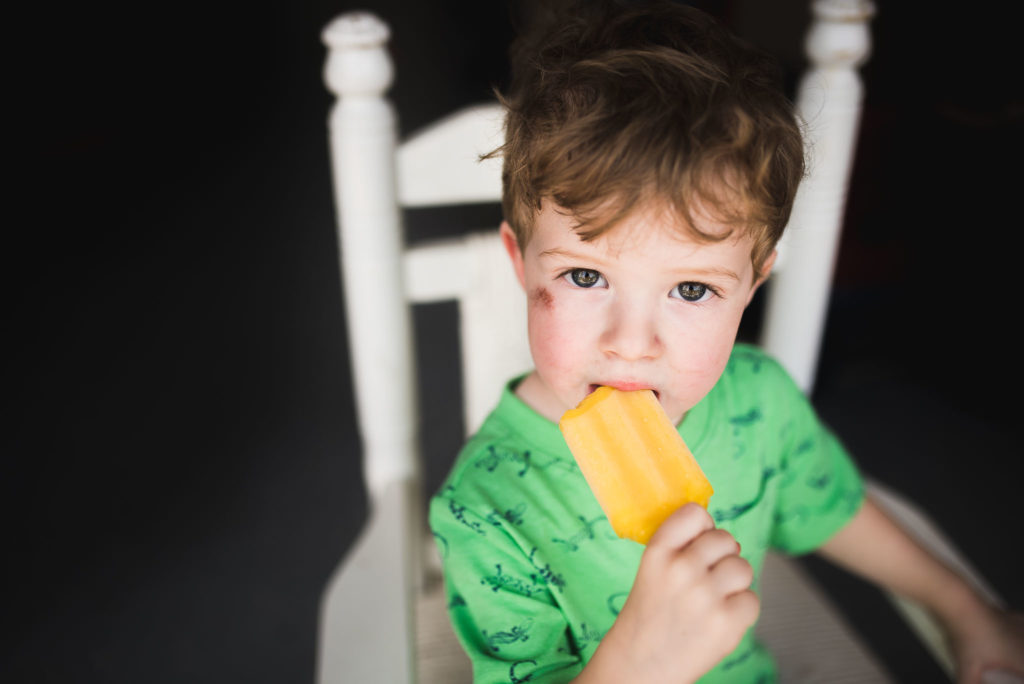
For example, this photo was taken midday at the edge of my garage on a sunny day. If you look close enough, you can see the sky in the catch lights of his eyes. This helped to light up his face and make his skin more smooth and creamy.
Overcast
When there’s no sun in the sky, this can be great news for having less shadows, but is is best for creating creamy skin tones?
That’s debatable for me, personally. But, if you know how to work the light, you can get awesome results.
The light might be more evenly spread out, but it can cause shadows on your subjects if you aren’t careful. Before taking any photos, move your subject around in different directions to see how the light falls on their skin.
The best placement is turning your subject’s face towards the sun. This will evenly distribute the light (kind of like a giant softbox in the sky) and create creamier skin tones.

In this example, the subject is facing towards the light source which eliminated a lot of shadows on the face.
Backlight and golden hour
This is personally hands-down FAVORITE type of light to work with. Who can resist some glowing, warm light?!
Not only is this type of light dang gorgeous, it makes beautiful skin tones as well. But, it can be a tricky art to master and if you don’t do it right, skin tones won’t look amazing.
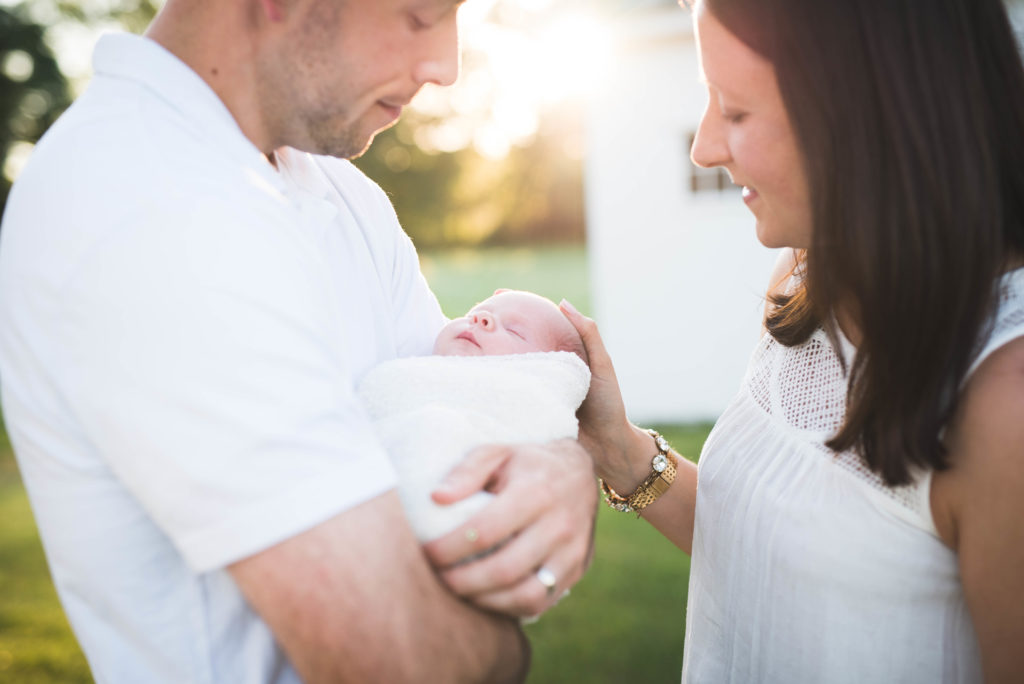
Backlighting 101: use your subject to block out any direct light that is hitting your lens. Too much light on your lens will cause flare and will wash out the photo (which isn’t all that great). Also be aware of the lens you are using.
If you use a longer lens, there will be more opportunity for the light to fill up your lens and cause flare. The short length of the lens will allow you to get closer to your subject to help block out the light. That’s not to say that you can’t use a longer lens, you just need to be more mindful of where you place your subject.
What is golden hour?
It’s that time of day when the sun is lowest in the sky and produces a warmer glow. This happens within 2 hours after sunrise or 2 hours before sunset.
The “magic hour” is right before the sun dips down into the horizon and there’s more opportunity to capture the sun without harsh shadows.
Just like with back lighting, you will need to place your subject in a way that has them blocking part of the sun on their back. This ensures that the light is captured, but also the skin tones are creamy and clear.
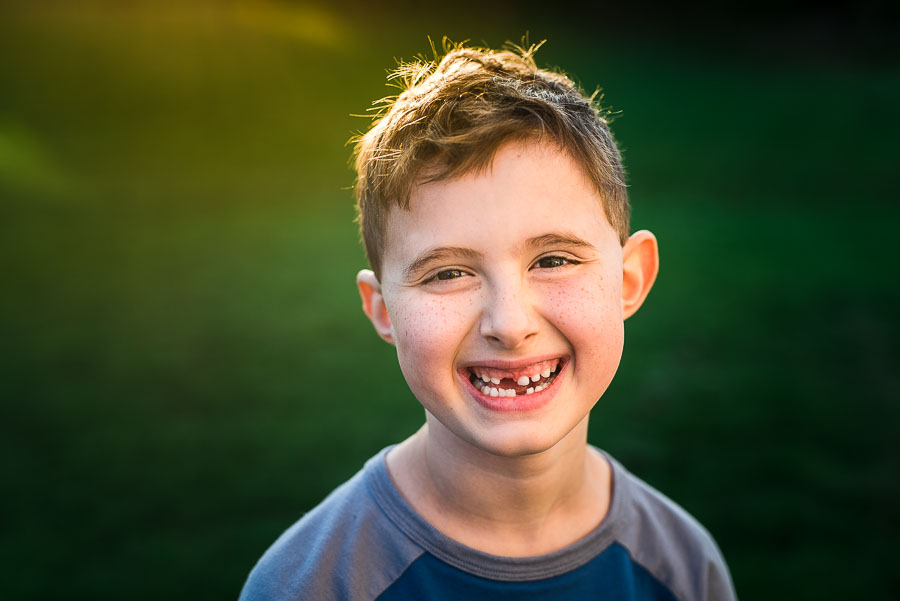
Shooting slightly above the subject, my lens angle was just right to not allow any light flooding my camera. By exposing for the skin, I captured the sun glow in the background while simultaneously creating the creamy skin look.
Reflected light
I will be honest. As a lifestyle portrait photographer, I don’t use a whole lot of reflective light. Not because I don’t enjoy the results, it just becomes a hassle when trying to capture candid moments of kids.
But, when I do use, I LOVE the results.
Reflected light is simply using natural light that is bounced back onto the subject. This creates a more even look to the skin and reduces the shadows (which can be helpful if you are in less than optimal shooting conditions like full sun).
You can use reflected light in 2 ways.
First, you can use the environment to bounce light back onto your subject. This could be a wall in an alleyway, the pavement your subject is standing on, or a sidewalk in front.
Another option is using a portable reflector to bounce the directional light back onto the subject. I prefer to use reflectors when I am shooting midday or when the session location has a lot of weird light scenarios.
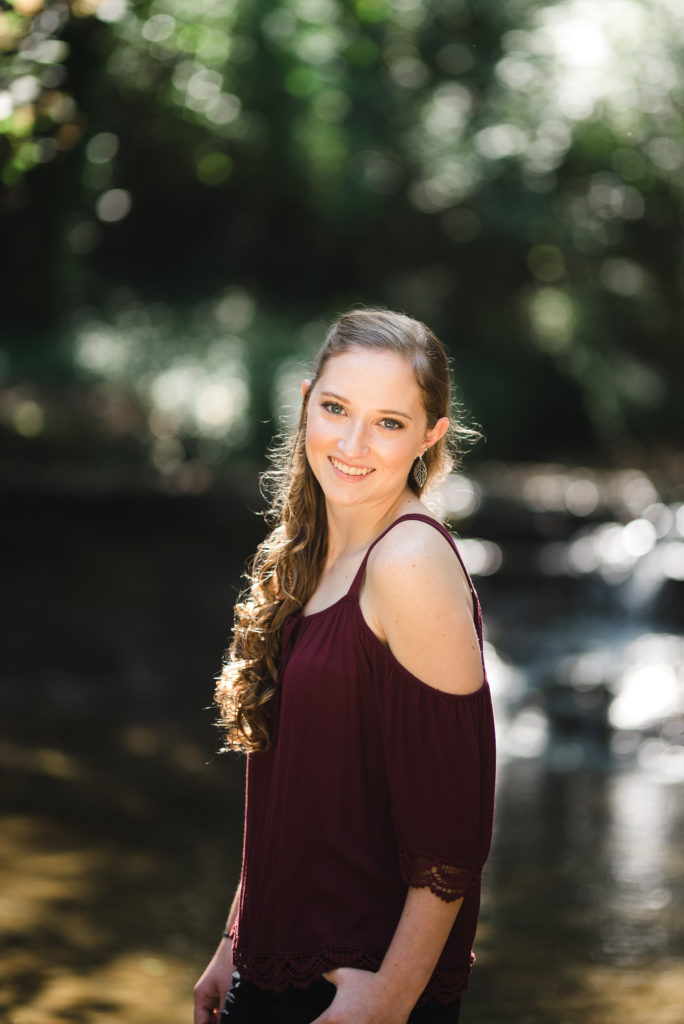
Take this photo for example. This senior session was taken midday at a creek location – not a time and location combo that I prefer. You can see the sun filtering through the trees in the background, so that left a lot of harsh shadows. I combated that with using the golden side to my reflector to bounce light back onto her.
This is a very inexpensive way to add more light to your subject. You can grab most reflectors (like this one) for less than $30, which makes it a great little tool to take along to every session.
This resulted in a warm, creamy complexion on the face without having to use external light.
camera settings
Now that you know what type of light to look for, you need to focus next on your camera settings.
Your camera settings will make all of the difference to how your skin tones will look, so don’t skip this step!
For starts, you should be shooting in manual.
This way, you can determine your camera settings for the best end results. Shooting in auto is not recommended as you will need to be manually metering on your subject’s skin.
Now, there is no exact formula to follow, as lighting conditions and the time of day will determine your settings. But, there is a process that I use and suggest to get the best results.
1. Set your ISO first.
Your ISO is how sensitive your camera sensor is to light. In the film days, you’d have to grab high ISO film when shooting at darker times of the day or indoors. The higher the ISO, the more light that you can “let it” to your camera.
The higher your ISO, the bigger risk you run that your photos will turn out grainy. This isn’t a problem for newer and more professional camera models, can be quickly be problematic using an older camera model.
Every camera has a different range of ISO values, so yours might be different than mine. No matter what your range is, always try to keep your ISO as low as possible.
2. Next, set your shutter speed.
If you are photographing moving subjects, then choosing a higher shutter speed will help you capture the moment without it becoming blurred.
A good rule of thumb for portraits is setting your shutter speed to AT LEAST 1/125. This will help ensure that your photos won’t become blurry. At this point, you might need to adjust your ISO in order to get a shutter speed that will capture the motion.
For non-moving objects without the use of a tripod, it’s not suggested to shoot at anything below 1/60 for the same reasons – the likelihood of blurred photos.
3. Select your aperture (f stop).
F stop ranges are determined by the lens itself, not the camera. Professional lenses can have f-stops as low as 1.2, while basic kit lenses usually start out around f4.
What do those numbers mean? In basic terms, the smaller the f stop, the wider the lens opens up. The wider the opening, the less area of focus you will have. This is what gives photos the elusive look of “blurred backgrounds“, by using a large (or wide) f stop. You can take a closer look at how f-stop affects the look of your photos in this post.
A good rule of thumb to follow when photographing portraits is selecting 1 f stop for each person in the photo. For example, if you are taking a picture of 1 person, you can get away with shooting at f1.4. But, if you’re shooting a group of 5 people, then your f-stop should be around f5.6 in. This will help ensure that the area of focus is large enough to have everyone in the photo sharp and in focus.
So, choosing your f-stop really depends on WHAT you are photographing, what your end goal is, and what your other settings are.
In order to get creamy skin tones, you need to pay hard attention to your EXPOSURE and LIGHTING.
When I am taking portraits, I use my camera meter to meter my subject’s skin. This way, I know that the skin will be perfectly exposed and will result end that creamy look.
Personally, I tent to shoot around 1 stop underexposed to make sure all of the details in the photo remain intact. This post will help explain why.
Enhance with editing
The final piece to the puzzle of getting dreamy skin tones is in the editing.
Using dodge & burn techniques, along with presets and brushes, will help enhance the look of your photos.
When editing for creamy skin, I like to do these editing tasks in this order:
1. Adjust the exposure and white balance. If my settings in camera where off, then this is when I would fix it.
2. Use a preset to apply the base editing. I use these presets in all of my editing – they were made for creamy skin in mind.
3. Sharpen and apply vignettes if needed.
4. Polish up with brushes. I like to use a simple dodge & burn technique to edit most of my portraits, you can take a look at the full Lightroom process here.
Editing is just one part of the process and it’s NOT what makes the image.
What makes the image is knowing your way around light and your camera settings and then using editing as a way to enhance it all.
Presets are no different. They will certainly help polish your images, but they aren’t created to fix bad lighting and camera settings. I create a variety of presets that you can easily edit your photos with to create creamy skin tones – check them out here.
If you enjoyed this post, you might also like:
4 ways to get a blurry background in your photos
Photo editing tips for beginners
moody portraits: 4 ways to easily take them indoors
Top 5 Lightroom Editing Styles you can easily replicate (with before & afters)

Reassuring that I’m doing some of these things! The F stop trick with number of people is super helpful.
always reassuring! Glad you found it helpful 🙂