

MINI SESSION photos. Do you feel like at the end of a mini session event that you’re just swimming in them?
While they are typically shorter sessions, the mini session photo count can start to rack up pretty quick.
Mini sessions have their perks and their drawbacks for sure.
On one hand, they can bring in a lot of new clients, sessions, and profits all in one day or afternoon.
Mini sessions are the bread and butter of my holiday business. Sure, I could probably get along just fine without doing them. But, they are a fun way to serve a lot of people in a short amount of time.
What makes minis so great around the holidays is that so many people just want a few Christmas card photos – not an entire photo session. By carefully planning out my schedule, it’s an easy way to sell out the day and bring home the bacon in an afternoon.
On the other hand, mini sessions can be burdensome to edit.
With so many different photo sessions to edit, the photo count quickly increases and it’s important to keep your editing time down so you can turn a good profit. (because the more that you work, the less that you make).
(psst…you can read read this post to learn how to be more profitable with mini sessions)
But, mini sessions don’t have to be this or that.
You can actually photograph multiple sessions, keep your editing to a minimum, and send off those finished galleries within a matter of minutes. In fact, I do not spend more than 15 minutes per mini session and can pump out 4 per hour.
In this post, I am going to show you exactly how you can accomplish this too!
You can actually edit mini session photos super fast when you keep a few things in mind, let me show you how.
BE PICKY ABOUT THE LOCATION
I cannot stress this enough. The location is not near as important as you might think – what matters here is the quality of light.
Light is king. You will hear me say this a lot if you stick around long enough. If you have crappy light, then you’re going to end up with crappy photos – sorry to be so blunt.
If you want your subjects to look their best and to edit less, then you will need to make light your top priority.
When you are photographing outside for your mini sessions, be mindful of the light during the day. Having a cute setup is nice, but if the light is bad and it makes a mess during your editing, is it even worth it?
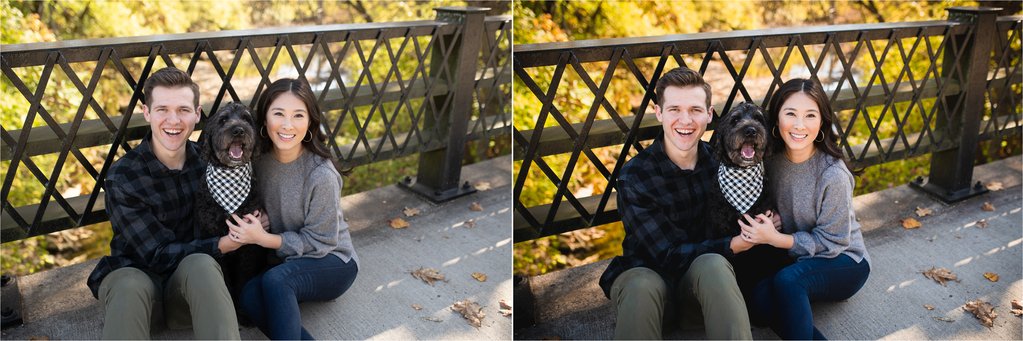
Example: this session was taken during midday on a sunny day. I placed my subjects on the ground away from the sun in a patch of shade to avoid harsh light on their face. This resulted in better lighting that was easier and faster to edit.
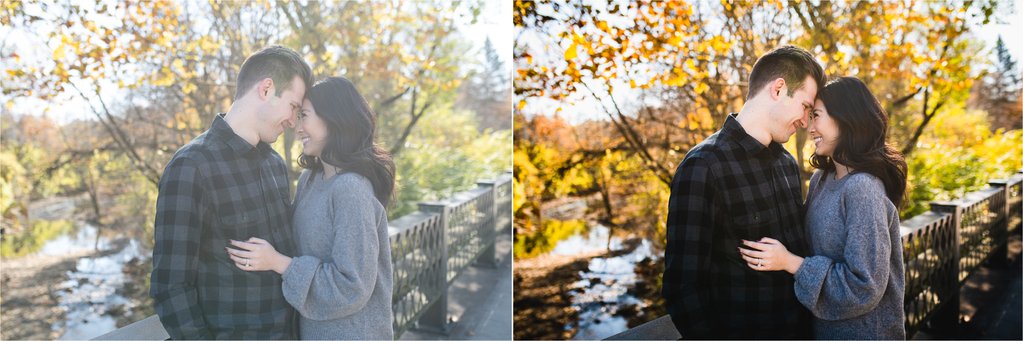
But, when I stood them up, more light flooded my camera and created a washed out look that took me longer to edit. So don’t forget – light and placement is key for better photos! (check out this tutorial on how to fix this problem in Lightroom)
BE MINDFUL OF YOUR CAMERA SETTINGS
There’s nothing worse than getting caught up in a quick mini session and forgetting to check your camera settings.
Been there, done that.
Before getting caught up in the whirlwind of a mini session event, take a moment to be mindful of your settings.
It’s even worth it to take a few test shots before you get going.
What I like to do before I get started with a client is have them get their pose setup. While they are getting arranged, I let them know that I will be taking a few “test shots” to make sure my settings are right.
Not only in this the perfect opportunity to setup my camera, but it’s a fun and sneaky way to get candid photos without my clients feeling like they are being put on the spot.
It’s worth every second or minute that it takes to setup your camera settings before you start shooting – because it will cost you more with your editing if you don’t.
CHOOSE THE BEST LENS
Depending on the given light at your location, you will also have to consider which lens to grab for the job.
When you’re working against the clock and hard lighting conditions, then knowing which lenses in your bag that will help you create near-perfect images is invaluable.
If there’s a lot of sun, then using a long lens might create washed out photos, so make sure that you grab an appropriate focal length for the setting.

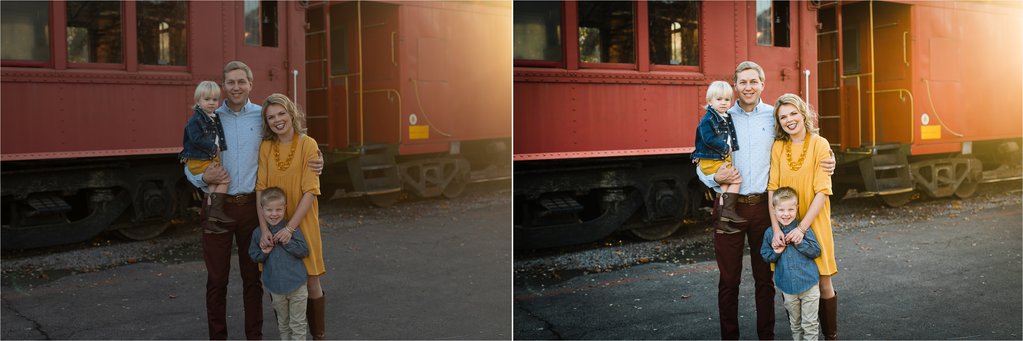
Example: for this photo I used a 50mm prime lens. Because of the sun, subject placement, and time of day, a longer lens would have allowed more light into my camera sensor and washed out the photo. But, choosing this lens along with placing my subject more carefully, only a small sunburst was captured instead (which was completely intentional by the way).
SHOOT WITH THE END GOAL IN MIND
This merely means to aim for a perfect photo, every time you snap the shutter.
Being aware of your settings in relation to light and client placement will help you edit quicker – as there will be fewer mistakes to fix.
It’s also worth noting that the QUICKEST way to edit mini session photos faster is by keeping each session in the same general area with similar lighting. This will make it easier to batch edit and shave off a slew of time behind the computer screen.
USE PRESETS & BATCH EDITING
When you create an atmosphere that helps creates perfect photos, using presets and batch editing your work becomes the pinnacle of FAST editing.
This is where everything comes together, and if you did your job right in-camera, then this should be a breeze.
Time is money, so I don’t like spending too much editing photos (I’d rather spend my time in my business other ways that earn me money). This is just 1 reason why I use Lightroom – it only takes me a few minutes to edit a mini session.
If I photograph 3 mini sessions in an hour, then I keep my editing time the same and will edit those in an hour – or less. Most times, it only takes me about 15 minutes to edit a mini session gallery from start to finish.
Here is exactly how I am able to edit my mini session photos sessions in 15 minutes tops:
- I cull down the session to my final picks. For a mini session, this is usually around 20-30 final photos.
- I choose the best Lightroom preset for the session and edit the main photos/lighting types from the session. Because I am so used to using presets, I can pretty much just look at a photo and know which preset to use on it. This saves me even more time during the editing process.
- I batch edit the photos that are similar to the main photos. In just a few clicks, I can edit the rest of the photos from the session and call it a day. Batching is what makes this super fast and how I can edit mini session photos so quick.
For tree farm sessions, the Storyteller presets are rapidly become my favorite set to reach to first.
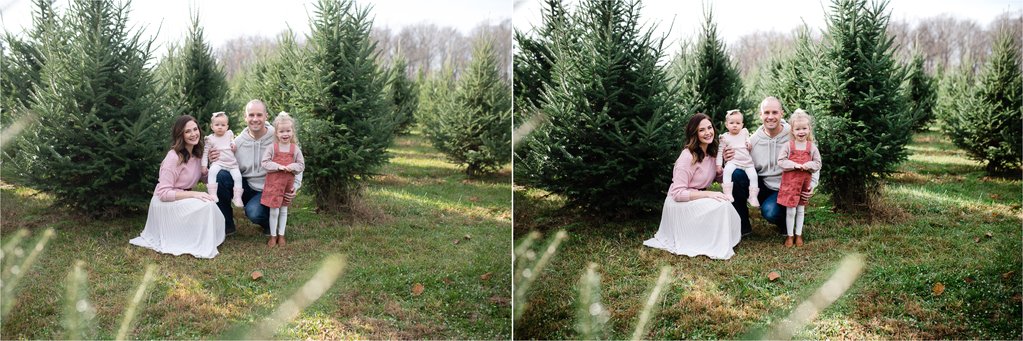
They are great for bold, crisp photos while getting that slight desaturated green style that resembles the classic film look.
For urban sessions and pretty much everything in between, Life in Color is my go-to collection.
I LOVE using the ‘Dazzlin’ preset to enhance creamy skin tones and also add a burst of color that truly makes urban sessions shine.
All in all, you can edit your mini session photos faster when you make a plan and stick to it.
In no time, you will be able to knock out mini session photos faster than you take them. This is the ultimate goal that will make your schedule and your wallet both very happy.
If you enjoyed this post, you might also like:
4 ways to add more colors to your photos (without overdoing it)
How to get beautiful creamy skin tones in your photos


be the first to comment