


If you stick around here long enough, you’ll start to notice that I love to add more color to my photos.
Life can be crazy, hectic, and sometimes downright depressing, but adding color to photos reminds me of all of the wonderful things!
Sure, I love a good moody photo that tells a story, but there’s just something I love most about color.
Photos with colors are full of wonder, youth, excitement, and joy.
And those are the things that I choose to focus on in my own personal photography – along with candid moments and natural expressions.
In a way, photos that are full of color that reflect happiness and joy are therapeutic for me.
I had a great life growing up. Amazing family who loved me. Great friends. Many good times and memories. But, as an introvert and over-analyzer, I was also very attuned to over-thinking – especially when it came to my self-worth and beliefs in myself.
I constantly told myself lies about myself and it manifested in every way imaginable.
I never had a boyfriend. I must be ugly.
I didn’t have a lot of friends. I must not be very likeable.
I didn’t make straight A’s. I must be dumb.
I never scored goals in soccer. I must be a crappy player.
These lies I told myself daily and overtime, it become an inside loop of depressing thoughts.
Good thing that I grew and matured in ways that allowed me to see past those lies. The one thing that did help me overcome all of this self-doubt was photography and becoming a more confident photographer.
Out of the darkness of my thoughts, came these light-filled, colorful photos to remind me of all the good things.

Colorful photos may just seem like another editing style, but it means so much more than that to me.
That’s why it’s my FAVORITE editing look and where most of my inspiration comes from color (and why I share so many fun & colorful editing tips here).
You can add more color to your photos too, but sometimes it comes at the risk of “overdoing” it.
Over-doing it comes from too much editing. Yes, there is such a thing.
When it comes to photo editing, there’s a fine line between photos being vibrantly colorful and over-processed.
What defines as being over-processed?
This is obviously subjective, as all art is, but over-processed is when there is too much.
And “too-much” simply cannot be defined, but it can be easily spotted.

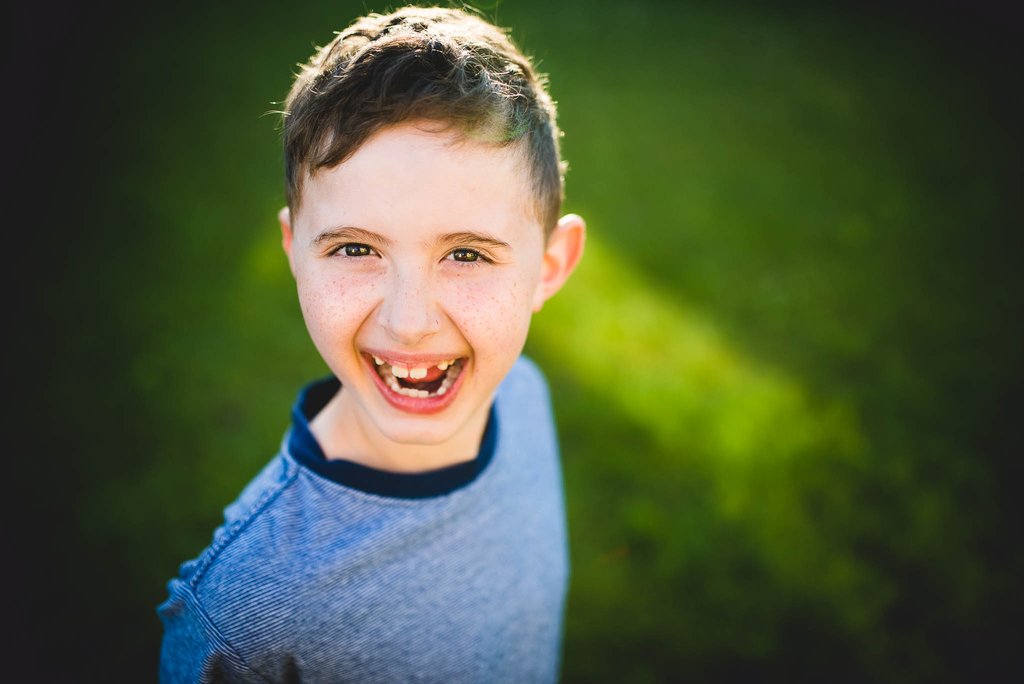
Take this photo for example. It’s bursting with color, but one of them is over-processed. Can you tell which?
If you guessed the photo on the right, you’d be correct.
The photo on the right IS colorful, but the saturation is a little too much for the skin tones. You can also notice the color casts in the hairline and also in the shirt – how they are become more prominent and yellow.
While I love me some color, there is such a thing as too much.
Now that you know WHAT to look for when editing your photos in color, you can start to learn HOW to add more color to them.
SHOOT IN RAW
First things first: what does RAW mean?
A RAW camera file is simply an unedited, unfinished file format. These files cannot be viewed unless you have a special editing program (like Lightroom) to view them on.
I like to explain this in simple terms and with analogies (if you follow me long enough, then you’ll learn to get used to it).
RAW files are a lot like raw ingredients in baking – let’s say raw cookie dough (yum!).
You have all the stuff in the cookie dough to make a delicious cookie, but you still need to bake it. That’s where your editing program comes in. You take the RAW ingredients and you put it through the oven to create the final baked good.
When you shoot in RAW, your camera takes all the information and leaves it alone. When shooting in JPEG on the other hand, your camera bakes the cookie itself the way it THINKS it should.
When setting your images in your camera to shoot in JPEG, your camera bakes it. It takes all of that information and compresses it to make it a final image by applying sharpening, contrast, and color. These files are ready to be viewed on any device, and some would say that they don’t need edited at all.
But, there is one drawback to shooting in JPEG:
You don’t have as much control to how your photos will ultimately end up looking like.
Besides from having more creative control when working with RAW images, you’ll be able to bypass the JPEG compression of your camera and the unnecessary editing steps your camera spits out.
When you are working with RAW images, you basically have free reign to do what you wish with your photos without it looking overly processed. Thus, you’ll be able to add more color to your photos with ease.
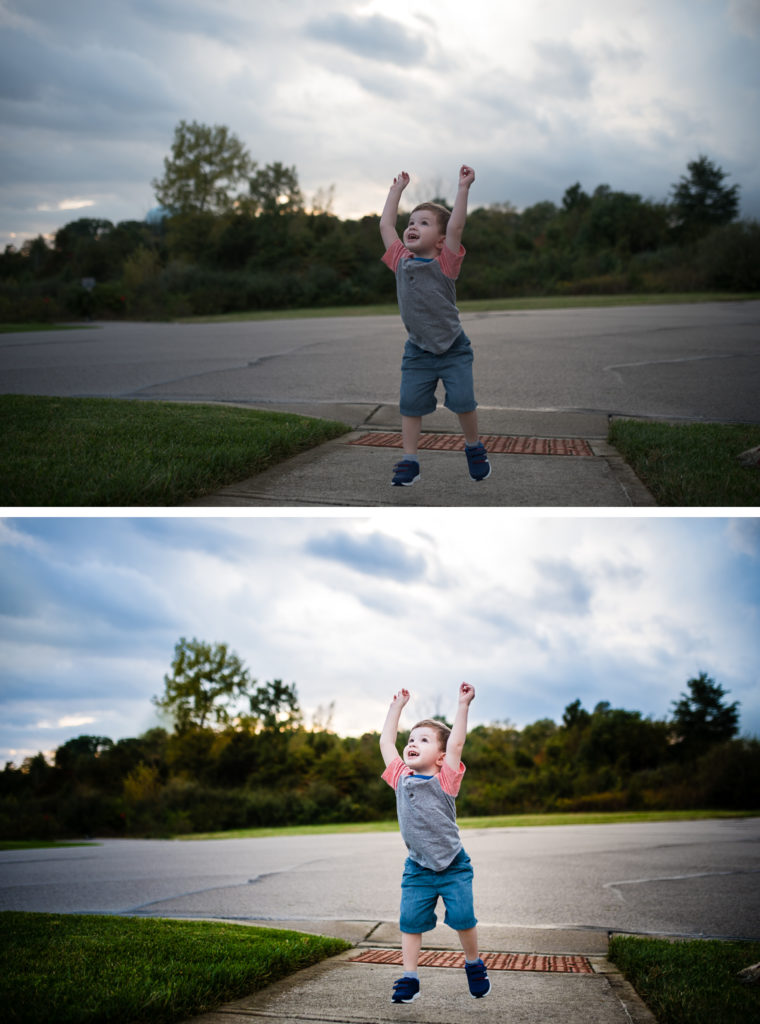
Shooting in RAW and slightly underexposed allowed me to enhance the color in the photo without blowing out highlights or losing any detail. I used these presets to create this look.
SHOOT UNDEREXPOSED
Now this is completely debatable, but I have spent many years tweaking and playing with editing. I have tried out many various editing styles, so it’s not something I am just putting out there for the sake of typing more words.
I have come to the conclusion that if you want rich, colorful edits, then underexposing your photos will give you the best results.
why?
Because when you shoot slightly underexposed, your camera will preserve a lot more details in your photos.
When you setup your camera settings to shoot underexposed, it preserves that rich detail & allows you to bring more light and color into your images with your editing.
Basically, shooting in RAW and underexposed is the starting point to adding more color to your photos.
Feel free to check out my natural light guide full of camera and lighting tips to create better photos.
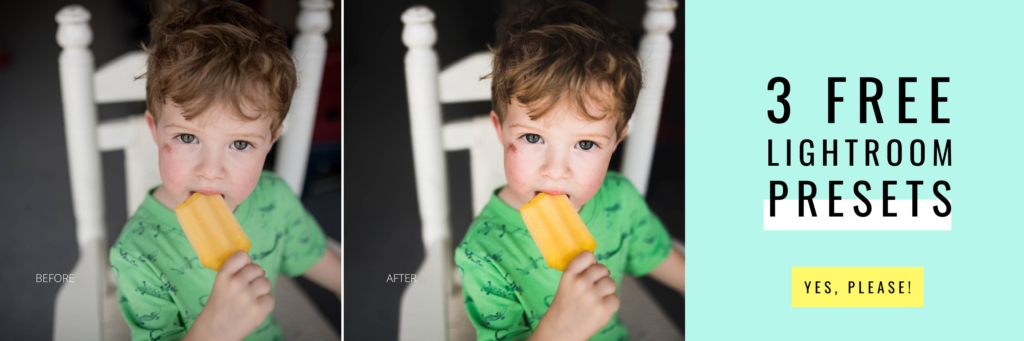
use PRESETS to add more color
Lightroom presets that is.
Lightroom presets are recorded editing steps that you can use over and over again. It’s a quick time-saver and they can give your photos beautiful, consistent results.
These could be of your own kind or like my very own Life in Color presets (the perfect blend of color and vibrancy).

If you are new to presets and don’t know where to start, I have laid it all out here for you.
Not only will using presets help save you time, they will help you create a streamlined editing workflow and a consistent editing style.
If you are finding that your photos are all over the map in regards to style and consistency, then perhaps it’s time to consider your options.
Either narrow down your editing on what you like best OR find yourself the perfect pack of presets to help get you started.
USE FILTERS & BRUSHES
Presets are great, but nothing will make your photos stand out quite like adding some depth in your editing. This can simply be achieved by using radial filters, brushes, and vignettes.
Sure, using some of these tools doesn’t add more color (like dodging and burning for instance), but it will add contrast in all the right places and make your photos POP even more!
Check out this tutorial on how to improve your photos by using brushes and vignettes.
Once you’ve started using these tips and tools, you’ll be well on your way to creating colorful images that POP!
If you found this helpful, here are some other Lightroom resources that you might enjoy
New to Lightroom presets? Get started with this step-by-step guide and download a FREE starter pack.
What’s your editing style? Here are 5 Lightroom editing styles that you can easily replicate.
Getting started with Lightroom: These are the best import settings that you should be choosing.
Fast-track your learning with our signature Lightroom course. Sign up to get instant & lifetime access to over 32 video lessons.


be the first to comment