


Lightroom Sync settings. The ultimate way that changed my workflow forever.
Yes, that might seem like a bit of an extreme statement. But, it’s true!
If it wasn’t for the Lightroom sync feature, I wouldn’t be able to edit my photo sessions so quickly. Some as a little as 30 minutes!
As a business owner, being able to edit photos quickly, without sacrificing quality, is essential.
First of all, it doesn’t eat up my time.
There is always a choice when it comes to using your time. When you pour your time into editing your photos, you’re making the choice to focus on photos instead of things that might be more important.
Personally, I would rather spend 2 hours working on a strategic marketing plan than sitting in front of my computer editing client sessions. Because the more you work on something, the less you make.
Secondly, it saves my eyes from the screen.
I don’t know about you, but sitting in front of a screen for hours on end fries my eyes. So the less that I can sit and edit, the better.
And personally, I value my ability to see without my eyes feeling strained.
Lightroom sync settings for the win!
What is Lightroom sync?
In a nutshell, syncing in Lightroom is taking the global changes of an image that you edit in the develop module and applying those changes to other photos.
Essentially, it’s copying and pasting Lightroom edits. And not just 1 photo, you can sync as many photos as you’d like to.
When you have a lot of photos that are similar in style, exposure, and white balance, you can edit one of them and then sync the settings to the rest.
Lightroom syncing is a serious time saver and it’s been essential for my fast workflow.
Why use the sync feature?
As pointed out above, the sync setting feature helps speed up editing and saves a ton of time. You can use it to literally edit photos within seconds – and an entire session within minutes.
So the real question should be, why WOULDN’T you use the sync feature?
How to use Lightroom sync settings
- Make all necessary changes to your first image such as using presets, fixing exposure and white balance, sharpening, etc.
- With the same photo selected, hold down your shift or command key and click the gray area of the photos that you want to apply the adjustments to
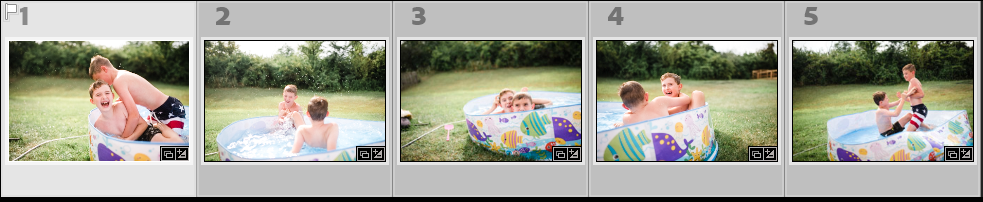
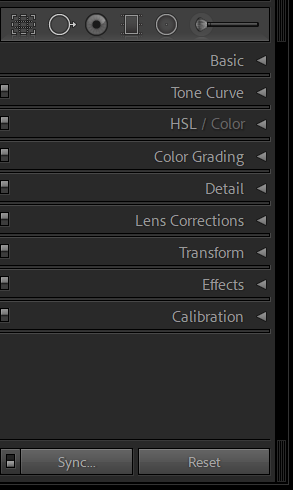
- Once you have the images selected, click on the sync button in the lower right corner of the develop module. The sync button will ONLY appear once more than 1 photo is selected.
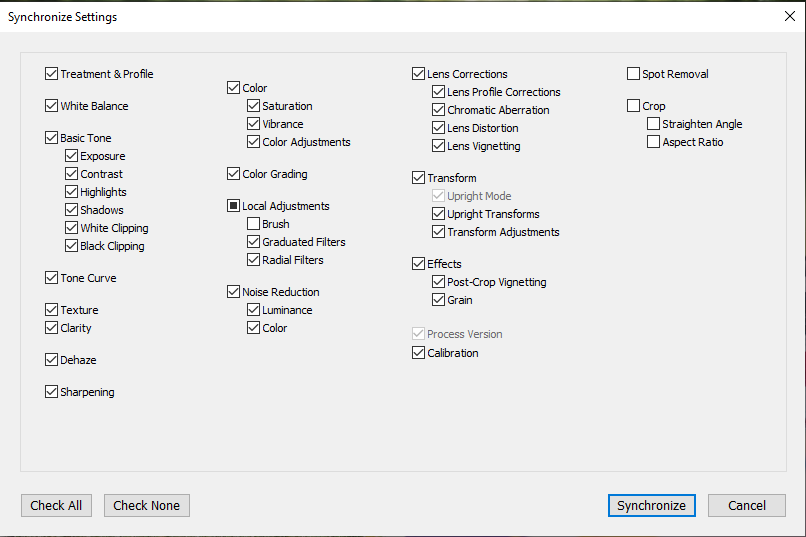
- Choose which settings you want to “paste” to the other photos and hit “synchronize” (notice how some options are left unchecked. There might be some things that you don’t want to sync to other photos)
- Rinse and repeat to use on different photos with the same lighting and background conditions.
Things to consider before syncing
While the sync setting feature saves a TON of time, it can also be a nuisance if you select certain options in the sync window.
Local adjustments (brushes), spot removal, cropping, and even certain filters should be avoided when using the sync settings.
Unless you want the same brush strokes to be applied to every single photo, then take the time to uncheck that option. Otherwise, you might end up having to go back through all of your images and manually remove brush strokes and spot removals.
For all of you visual learners, here’s a quick tutorial showing how to use sync settings in Lightroom.
If you found this helpful, here are some other Lightroom resources that you might enjoy
New to Lightroom presets? Get started with this step-by-step guide and download a FREE starter pack.
What’s your editing style? Here are 5 Lightroom editing styles that you can easily replicate.
Getting started with Lightroom: These are the best import settings that you should be choosing.
Fast-track your learning with our signature Lightroom course. Sign up to get instant & lifetime access to over 32 video lessons.


be the first to comment