


DO YOU EVER WONDER HOW PHOTOGRAPHERS create light-filled photos???
You know what I am talking about.
Photos with minimal shadows. Photos that are bursting with color. Photos that are flooded with light.
Light-filled photos doesn’t mean overexposed photos. It simply means there are more highlights and brighter ares that give off a light-filled look.
If you have been wondering how to get this look to your photos, then you are in luck! With a few tweaks in Lightroom, you can achieve this very look in just a few clicks.
Before we go any further, it’s worth mentioning that this is a lighting skill.
You will first and foremost need to know how to use light (either natural light or artificial light) to produce these types of photos.
If you have too many shadows in your photo, it’s going to be harder to add more light.
If you have harsh lighting, it’s not going to look bright & airy. Instead, you’re going to have a lot more contrast that will be hard to get rid of.
But, you can still get pretty good results with a few tweaks in Lightroom!
IN THIS QUICK VIDEO, WE WILL UNCOVER THE SIMPLE STEPS YOU NEED TO TAKE TO GET THAT BRIGHT & LIGHT-FILLED LOOK TO YOUR PHOTOS THAT YOU LOVE!
DON’T FORGET TO SCROLL DOWN AFTER YOU WATCH THIS VIDEO FOR YOUR FREE LIGHTROOM PRESET!
GRAB YOUR FREE LIGHTROOM PRESET HERE THAT WAS USED IN THIS VIDEO!*
*preset compatible with Lightroom CC & Classic only
ARVE Error: Invalid URL https://www.youtube.com/watch?v=Sb2yQoPwVA8&t=5s in urlARVE Error: src mismatch
url: https://www.youtube.com/watch?v=Sb2yQoPwVA8&t=5s
src in: https://www.youtube-nocookie.com/embed/Sb2yQoPwVA8?start=5&feature=oembed
src gen: https://www.youtube-nocookie.com/embed/Sb2yQoPwVA8Actual comparison
url: https://www.youtube.com/watch?v=Sb2yQoPwVA8&t=5s
src in: https://www.youtube-nocookie.com/embed/Sb2yQoPwVA8?start=5
src gen: https://www.youtube-nocookie.com/embed/Sb2yQoPwVA8
SO, WHAT DID YOU THINK? DID YOU LEARN SOMETHING NEW???
Let me know by commenting below & share with us your favorite takeaway from this tutorial. We can’t wait to see what you have to say!
I create Lightroom tutorials based on your words of encouragement, so your feedback is more important than you know!
want more LIGHT-FILLED photos?
Now you can edit like this in Lightroom with less time and more consistency when you purchase the entire preset collection, Call Her Crazy.
Call her crazy was designed to create vivid colors, radiant skin tones, and cheerful images.
With an array of colorful Lightroom presets along with complimentary workflow brushes, you can quickly breathe life into your photos once and for all!
What you get with these presets:
- 16 presets the create radiant skin tones + light
- 7 skin-enhancing brushes
- 1-click edits
- a faster workflow
- consistent editing style
- exclusive Lightroom training video
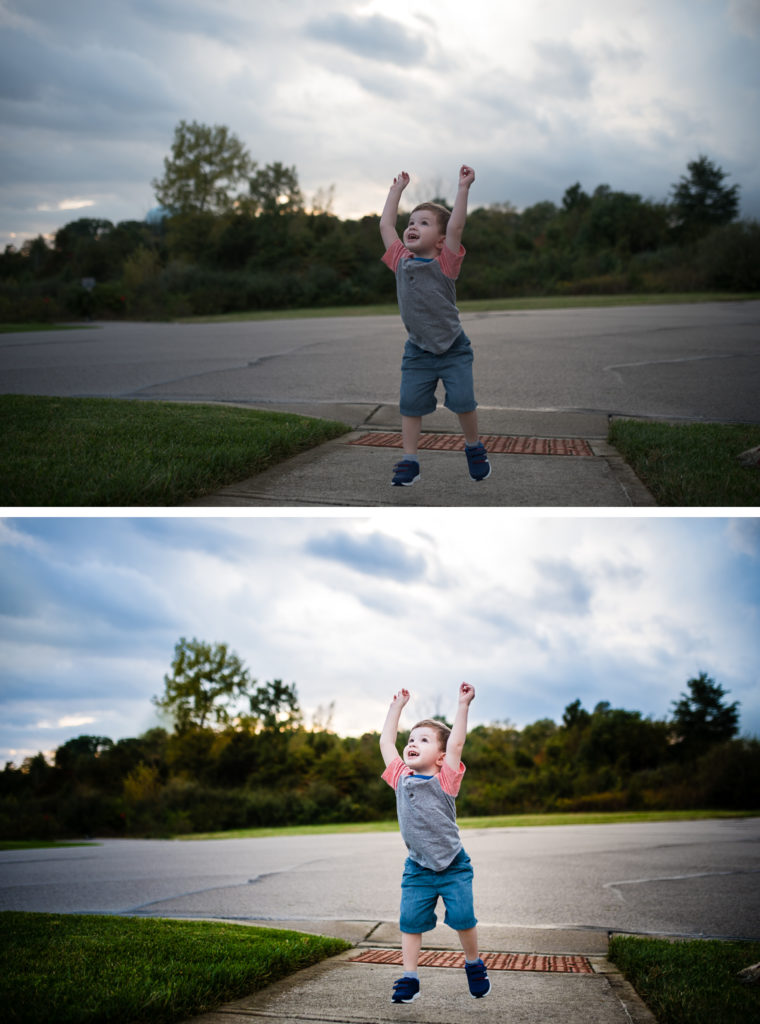
Photo edited with ‘Frisky’ from the Call Her Crazy collection.
And just by reading out blog, you can save $10 when you use this code at checkout: BLOGLOVE10
Take a closer look & see what these presets & brushes can do for you here.
If you found this helpful, here are some other Lightroom resources that you might enjoy
New to Lightroom presets? Get started with this step-by-step guide and download a FREE starter pack.
What’s your editing style? Here are 5 Lightroom editing styles that you can easily replicate.
Getting started with Lightroom: These are the best import settings that you should be choosing.
Fast-track your learning with our signature Lightroom course. Sign up to get instant & lifetime access to over 32 video lessons.


Thank you Heather! I honestly have been avoiding light room and presets because I thought it was super complex. You have made it way less scary.
You’re welcome, glad this helped!