


If you want to start to edit your photos better, and more like a pro, then learning how to use the tone curve in Lightroom is a must!
You might be able to get away by editing your photos with the basic sliders in Lightroom, but if you want to fully unleash your creativity, then you should take notice to the tone curve.
In short, the tone curve in Lightroom will take your photos up a notch (or two).
What is the tone curve in Lightroom?
The tone curve, is a powerful tool that can be used to meticulously make changes to your photo at specific points. Basically, it allows you to adjust the brightness of any given area of your image.
The tone curve is used for adjusting tones (shadows, midtones, and highlights) to make images brighter, darker, and to overall adjust the coloring and look of the photos.
With the updated version of Lightroom Classic CC, editing with the tone curve is as simple as ever.
Instead of choosing between 2 different tone curves with different functions, all of the settings are easily accessed in one area as shown below.
Notice the adjust option with the circle icons to the right. This is where you can toggle back and forth between the different tone curves. There are two main curves: parametric and point. Then there are also 3 color channel curves: red, green, and blue.
We will discuss all the differences and what makes these tone curves so powerful when it comes to editing in Lightroom.
The parametric curve and the point curve.
When you scroll down to your tone curve in Lightroom (classic CC, 2020 & up), you will notice a tone curve with 5 adjust options on the very top. If your tone curve doesn’t have this option, you still have these options, but in a different setup.
Each of these options affect different things when editing your photos.
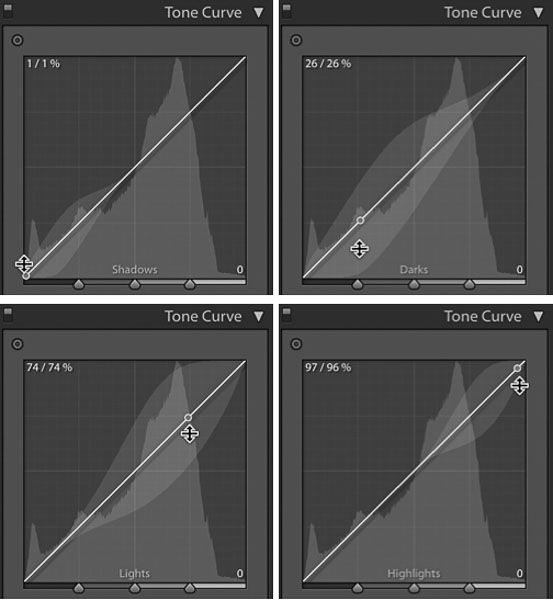
The parametric curve can adjust your highlights, lights, darks, and shadows with easy-to-use sliders. This is a quick way to use the tone curve in Lightroom, but it is more restrictive than the point curve.
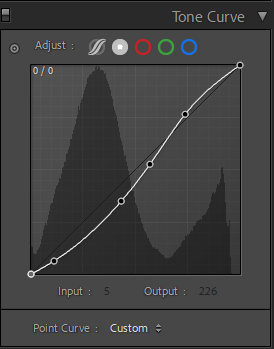
The point curve allows you to add a point to any part of the tone curve line to adjust the shadows, midtones, and highlights manually. This is a more advanced, yet optimal way to edit your photos with the tone curve.
With the point curve, you can essentially change any aspect of your photo by adding points and “pulling” them in a direction to alter the look of your image.
The point curve is what you want to focus on.
The point curve is much more advanced, yet provides the best changes to your images. This is where your photos can take on a completely different look!
You can adjust the point curve in two ways.
First, you can manually add a point to the curve line and move it in which way to adjust the look of the curve.
Another way is to select the pinpoint in the upper left corner of the curve menu and select a point on your image to manipulate. Moving the pinpoint up will add more light to that certain part of your image, while moving it down will add more darks and shadows.
From there, you can add, delete, and move any points on the tone curve that you create.
Why not just use the basic panel sliders in lightroom? What makes the tone curve so special?
The basic panel in Lightroom is a great tool to know and use when it comes to editing. But as far as complexity goes, it greatly lacks.
You might be able to get by using the basic sliders and make your images look pretty good, but it doesn’t offer as much fine tuning as other adjustments that you can make in Lightroom, Namely, the tone curve.
The basic panel is great for slight changes, but the tone curve is a much more selective tool that can really help you pinpoint your editing. You can be more selective where the changes are being made versus an overall general area.
You see, when you adjust the sliders in the basic panel, you are adjusting the overall look to what those sliders are representing.
But when you add a pinpoint to the tone curve, you are only adjusting that specific area of the photo. This leads to overall more meticulous and creative editing.
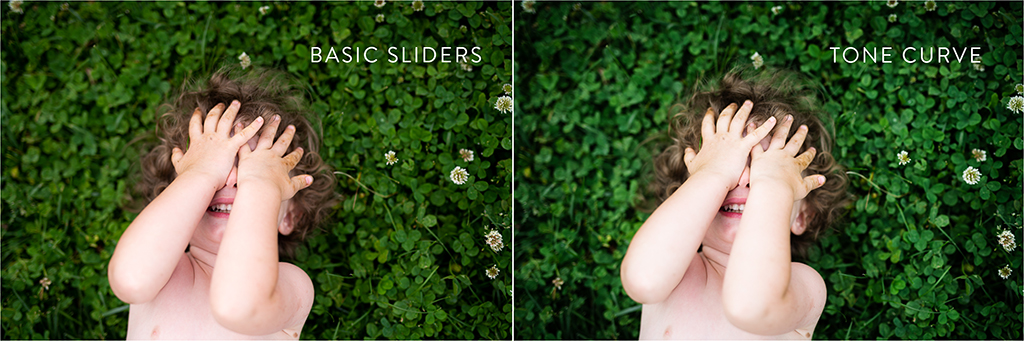
Here you can notice the vast differences in a basic panel edit vs. a tone curve edit.
In the basic panel, I was able to add contrast, change white balance, and add/remove shadows and highlights. The tone curve allowed me to go deeper and pinpoint exactly where I wanted those changes to be made instead of an overall look.
With the tone curve, you have more creative control over what you can edit and enhance in your photos.
How to adjust the tone curve in Lightroom
All you have to do in order to add a point to the tone curve in Lightroom is simply clicking on the line on the curve. This is will instantly add a point that you can move up, down, and side to side to manipulate the curve.
When you add more points to the curve, there will be more areas of the photo that you can manipulate with more precision.
Less points on the curve won’t be as precise, but can give you some major results in your editing. Like I always say: sometimes less is more.
If you made a mistake and need to delete a point on the curve, just right click on your mouse and choose “delete point.”
Adding points on the color channel curves.
You will notice there are three color channels in your tone curve: red, green, and blue. Also known as RGB.
We all learned in grade school that the three primary colors are yellow, red, and blue, but that’s not the case with photography.
You see, when digital cameras were made, the manufacturers created the camera sensors by closely replicating what the human eye sees. And what colors does the human eye predominately see?
You guessed it. Red, green, and blue.
So when it comes to editing, it only makes sense to edit in those three color channels because that’s how camera color sensors are created.
If you want to know more about the science behind this, then check out this link. Otherwise, let’s move on!
Adjusting the RGB tone curves can take your photo editing to another level.
Just like with the main point curve, you can add and remove points to any part of the curve line in these channels.
What this will do is add or remove a certain color to your photo.
Pulling the curve up will add that color to your image and pulling the curve down will remove that color to your image (and add it’s color opposite).
For example, if you have too much red in your skin tones, you can use the pinpoint tool to select which part of your photo that you want to adjust to remove the redness from. Then, simply drag the point down until you reach your desired look.
This doesn’t take much. The color tone curves are much more sensitive than the overall tone curves, so using a light hand will be all that you need.
Like shown above, the pinpoint tool is used to selectively choose which area of the photo to adjust in the color tone curve.
The redness of the skin is removed by selecting that area with the pinpoint and then bringing it down on the tone curve. Then again by adding yellow to make the skin appear more warm by reducing the blues in the blue tone curve.
This is an easy way to add, remove, or adjust colors and skintones in Lightroom without touching any other tool or menu.
Take it a step further with the parametric curve
Now this is something that I normally don’t do – as it’s not usually necessary – but it’s an option.
And having options when it comes to editing will give you more opportunity to create the types of photos that you love!
You can use the parametric curve to fine-tune your images and add a slight touch to your final look.
When you adjust anything on the parametric curve, your point curve changes won’t be touched. This is great news because now you can just fine-tune everything that you did!
Adjust the highlights, lights, darks, and shadows by moving the sliders underneath the tone curve. When you do this, you’ll notice that the lines on the curve visibly move to alter the look of your image.
I would define this as the icing on the cake.
Using the parametric tone curve smooths out all of the “kinks” and leaves your photo with a polished, final edit.
Because the points on the curve can be drastic, this method can make the changes to your photo look more evenly applied.
Try it out and see what happens!
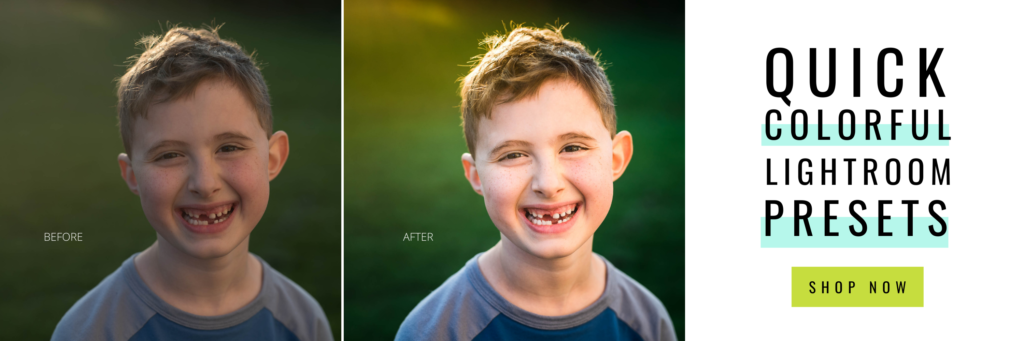
And if you want to be even more creative with your Lightroom editing, then check out my complete line of Lightroom Presets.
These presets were created to bring out color, vibrancy, and extra flare while still retaining color-balanced skin tones INSTANTLY.
Which set of presets will suit your individual style?
If you found these tips helpful, here are some more resources that you might enjoy:
New to Lightroom presets? Get started with this step-by-step guide and download this FREE starter pack.
What’s your editing style? Here are 5 Lightroom editing styles that you can easily replicate.
Getting started with Lightroom: These are the best import settings that you should be choosing.


be the first to comment