


WHEN YOU’RE looking for photo editing tips, it can seem like a lot to learn.
Where to start, what to do, and which editing program to use are all valid concerns and questions when you first jump into photo editing.
It can certainly be overwhelming to learn all these things – and you might even feel the need to learn them all at once, but that couldn’t be farther from the truth.
As a beginner, it’s best to start by taking the first step.
In other words, take it slow and don’t feel the need to rush to learn it all. There’s no prize for rushing into it and you’ll find that taking it slow won’t lead to overwhelm.
Do you need to edit your photos?
This is a very common question that I see asked in the photography community. It’s a valid question too, because some cameras can take a great photograph – so why would you need to edit it?
Well, there are a few things to keep in mind here.
First, if you are wanting to be a true artist of photography, you need to consider all of the aspects of creating the photo. Visioning the photo, framing it in your mind, selecting the camera and lens settings, and taking the final shot.
But, the final shot is hardly the final step to creating a great photograph. You also must put on the finishing touches that the camera alone cannot make, and this comes with editing.
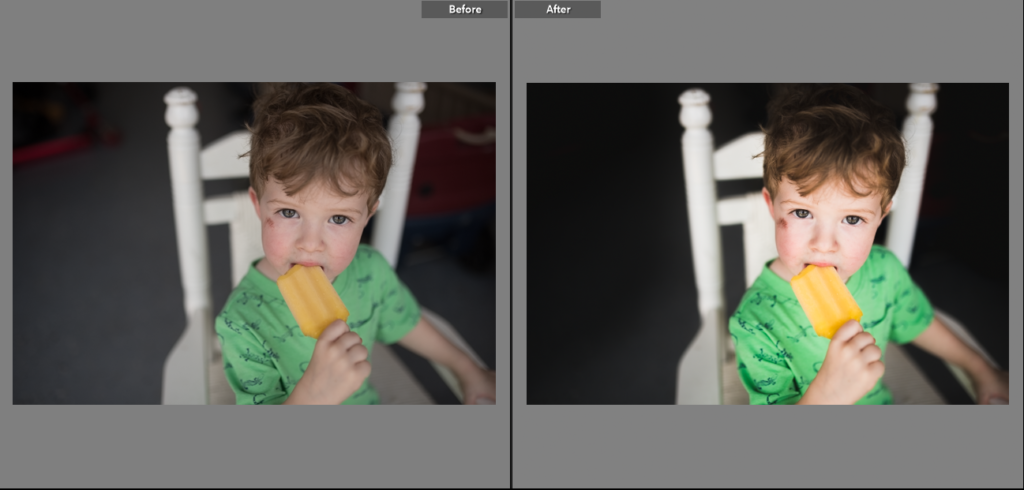
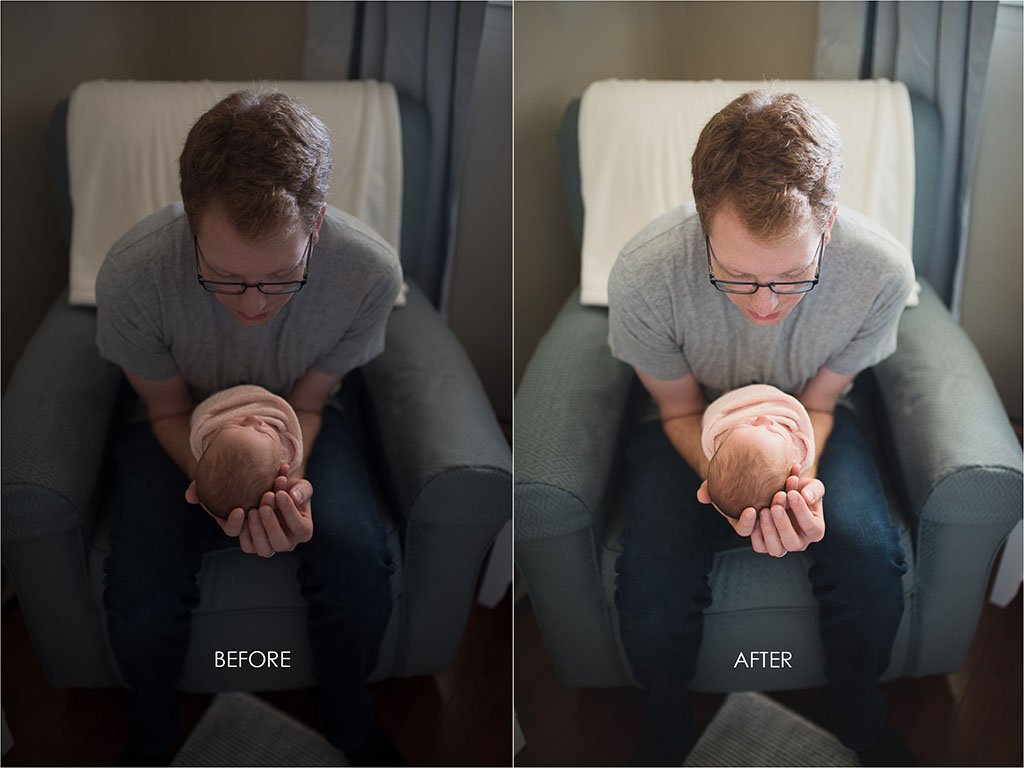
Before & after of an edited RAW photo. The before photo lacks contrast and color, which is brought out with editing in Lightroom.
But, photographers didn’t edit in the film days.
This is the common comeback and resistance that might surface in your mind when you are questioning whether or not to edit your photos.
It’s true that film photographers didn’t have easy access to edit their photos like we do today. But, that doesn’t mean that they didn’t enhance their photos in their developing.
Film photographers used a variety of developing techniques to enhance the final look of their photos in the darkroom.
Dodging and burning and cross processing are commonly used among darkroom photographers to help their photos take on various looks.
In other words, they don’t always just develop and call it a day. Sometimes, a little extra attention is called to create an even better finished result.
Editing can be used to polish your images
If you still find yourself resistant to the idea of photo editing, just think of it as your personal final touch.
Your photos will look even better when you put those final touches on them (and it doesn’t have to be a lot).
In fact, I am a huge advocate of not overdoing the photo editing.
It can be fun and exciting – especially as a beginner – to edit your photos and try to use everything you know. But, this can often lead to over-edited images and the results don’t look very natural.
So, going into photo editing with the idea that it’s only used to finalize your vision can be extremely helpful to avoid over editing.
Use these photo editing tips to help you get started!
CHOOSE YOUR editing program
First things first, you need to decide which photo editing program to work with.
There are a myriad of options available, with some being more powerful than others, so it’s important to know what your editing goals are overall before you start.
Typically, I like to recommend Lightroom Classic to any aspiring photographer wishing to learn photo editing and potentially building from there.
It’s not only a powerful editing program, but it’s a great program to reference your photos so you can organize them neatly and efficiently on your computer. It’s simple enough to learn the basics, but there’s enough tools that it’s equipped with to build on your editing skills over time.
Whatever you decide, it’s best to try to learn the basics of that software before trying anything with photo editing.
Learn how to use Lightroom from start to finish here.
TAKE TIME TO LEARN THE BASICS
When it comes to photo editing, the first place you need to get right from the get-go are the photo basics.
These include exposure and white balance.
Typically, these need to be achieved in camera. However, sometimes a little manipulation needs to be done in your editing to make them perfect!
That’s why it’s essential to know how to shoot in manual mode with the proper light settings.
When you can nail these two aspects of photo editing, you’ll be on your way to better photos in no time!
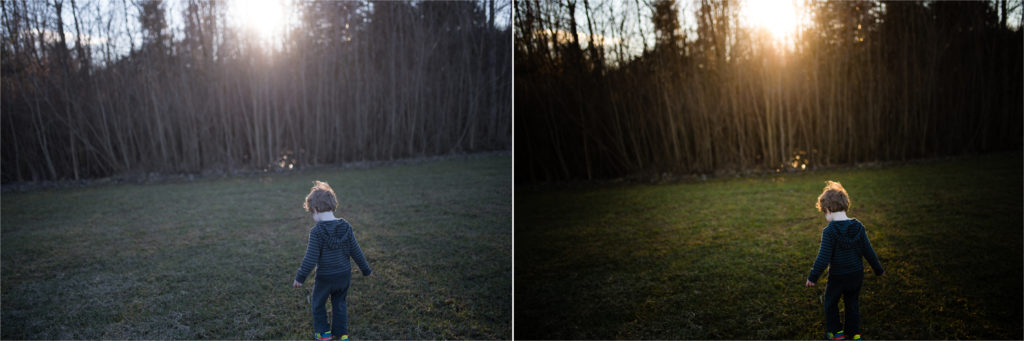
Little editing was needed for this photo. Using dodge & burning really helped to make this photo look polished – check out this tutorial to learn the exact process.
Find your photo editing style
You won’t be able to edit your photos the way you envision without knowing your desired outcome.
Do you prefer dark and moody images? Bright and airy? Perhaps bold and colorful?
Knowing what you want your photos to look like will help you tremendously when you you sit down to edit. Instead of wasting hours trying different looks, you’ll already know where to start.
Here’s 5 editing styles that you can replicate in Lightroom:
- Colorful
- Moody
- Bright & vibrant
- Classic
- Trendy
Why is an editing style important?
1. It’s YOUR signature as a photographer. Just like artists and writers have their own unique style, so should you! This will help you take on a more professional look so that others can quickly recognize your work.
2. It’s a HUGE time-saver! Once you get comfortable editing a certain way, it becomes almost automatic. Soon enough, you’ll be able to edit your photos within seconds rather than hours.
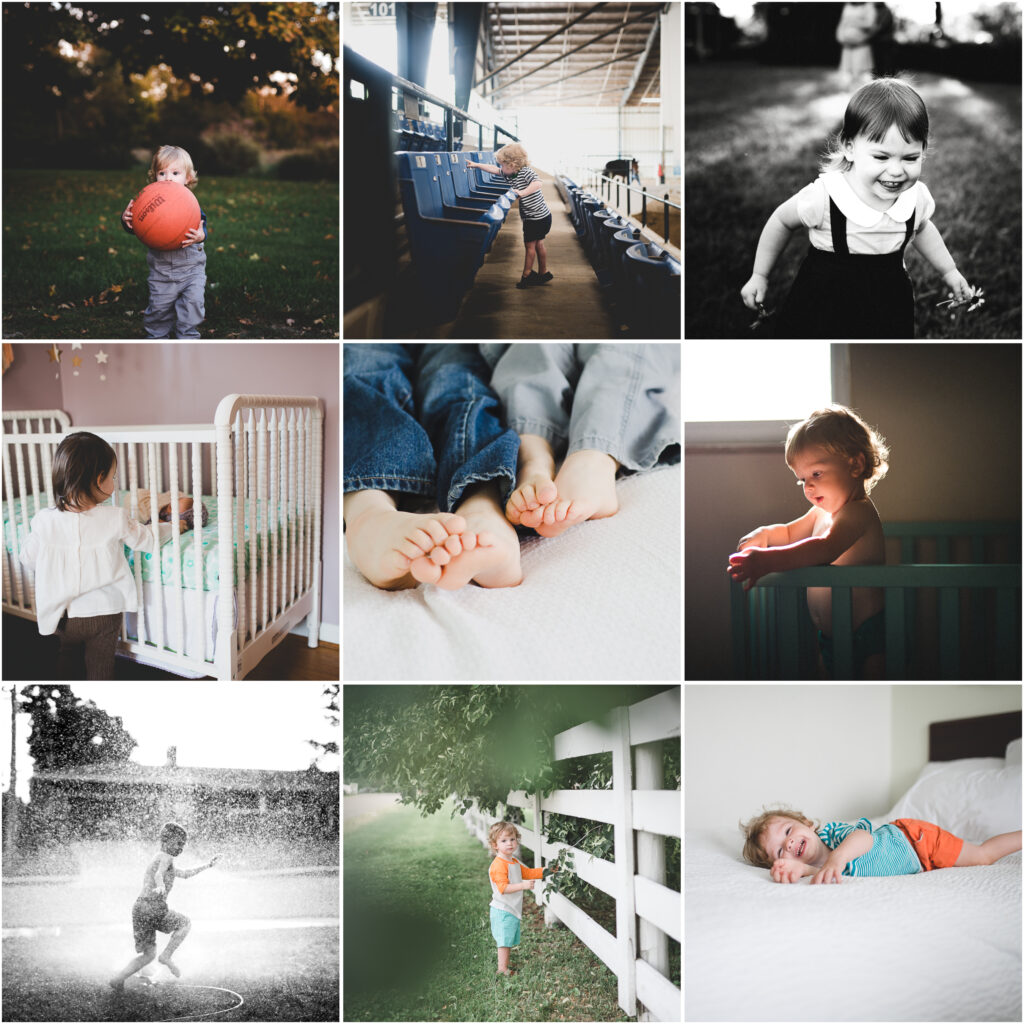
In this photo collage, all of the photos have different settings and backgrounds, but the editing looks cohesive. This is because all of these photos were editing with the same preset collection to give them all a consistent look.
Not sure what look is perfect for you? Check out this post next to see before & afters of these most popular editing styles
TAKE photo editing slow
Don’t try to tackle it all at once – that will only lead to overwhelm and eventual burnout.
Instead, try focusing on learning one new editing skill per week.
Once you have practiced enough with that one new thing, you can slowly start to learn more skills to add to your editing arsenal.
In no-time, you’ll have enough experience with all your new editing skills and it will become easier even faster than you thought!
And if you’re needing a little more hand-holding when it comes to learning, or you just don’t know where to start, consider enrolling in my online Lightroom editing course to help you learn it all faster than ever!
LESS IS MORE when it comes to editing
Editing photos is exciting, fun, and such a creative outlet being a photographer. But, you don’t need to sacrifice a good image for the sake of being overly creative.
Less is more in terms of editing, so in other words, don’t overdo it.
It might seem fun to keep tweaking and changing things to your photos, but the more that you do, the greater chance of it not having a professional and polished look.
Instead, opt for less and you’ll have a stronger image in the end!
Use Presets to help your photo editing
Using filters and presets can be a topic of extreme debate in the photography world, but it truly doesn’t have to be!
Some might find that presets only create a crutch when it comes to editing, but I believe that they can be used to help you find your style & learn about editing even better!
Plus, using presets really helps bring your photos to life even faster – so they are a great tool if you don’t want to be editing your photos for hours on end.

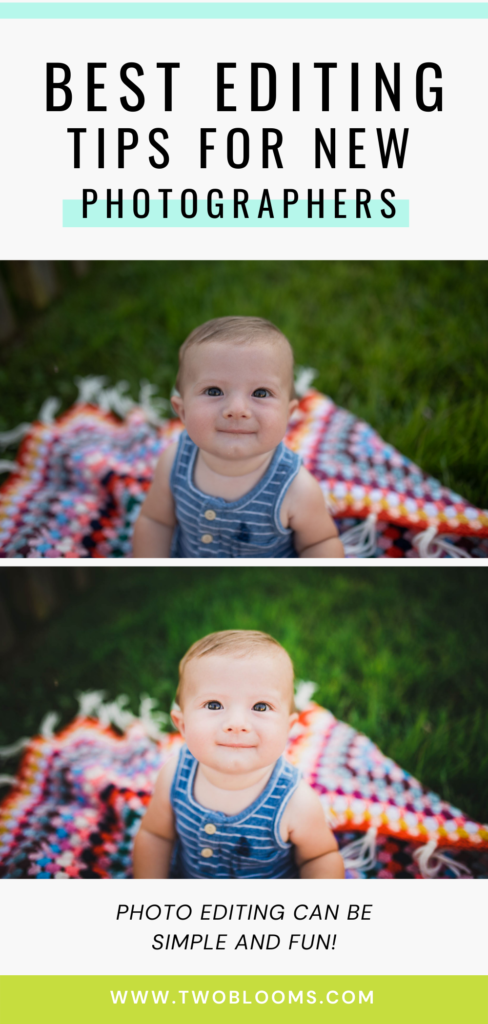
This photo was edited using our Life in Color Lightroom Presets.
Because it was shot in RAW format, the before photo has little contrast or color, which the presets helped to instantly apply.
Not sure how to get started with presets? This post explains what presets are and how to start using them.
Take your Lightroom skills to the next level the EASY & fast way
Sometimes it can be fun to figure out photo editing on your own. Sometimes it can be overwhelming though.
If you don’t know WHAT you need to learn, then how can you even start to learn?
That is why I created my online Lightroom learning course: to teach you exactly what you need to learn when it comes to photo editing.
With a step-by-step approach and lifetime access to the training videos, you can learn how to master Lightroom at your own pace.
Editing with ease is a complete learning experience if you’re dying to know how to to edit in less time so that you can focus on other things in photography.
If you found this article helpful, here are some other Lightroom resources that you might enjoy:
New to Lightroom presets? Get started with this step-by-step guide and download a FREE starter pack.
What’s your editing style? Here are 5 Lightroom editing styles that you can easily replicate.
Getting started with Lightroom: These are the best import settings that you should be choosing.
Fast-track your learning with our signature Lightroom course. Sign up to get instant & lifetime access to over 32 video lessons.


Hey Heather,
I am also beginner in photoshop and your ” photo editing tips for beginner ” most help to learn it . So Thanks for share this.
happy it helped!