


Editing dark skin tones in Lightroom can seem tricky at first, especially if you use presets.
Many Lightroom presets on the market aren’t universal in the way that they don’t always work on all varieties of skin tones. So, being able to know how to adjust presets or do your own hand edits is essential when editing black or dark skin.
NOT ALL SKIN TONES ARE EQUAL when it comes to editing in Lightroom.
What works for light skin, might not work for dark skin, so it’s important to know how to compensate your editing with different methods.
This should go without saying, but your #1 aim should be getting skin tones perfect in camera.
Relying too much on editing can not only be a pain, but it can also end up wasting your precious time.
But, mistakes happen and nobody is perfect, which is why knowing how to edit various types of skin tones comes in handy!
Editing dark skin in Lightroom is very similar to editing lighter skin tones, but there are a few things to keep in mind so that those beautiful brown tones don’t get over-edited and change the hue of their natural color.
You can watch this short tutorial or just keep scrolling to view the written version.
ARVE Error: src mismatchurl: https://www.youtube.com/watch?v=P-aAcfe-SbM&t=327s
src in: https://www.youtube-nocookie.com/embed/P-aAcfe-SbM?start=327&feature=oembed
src gen: https://www.youtube-nocookie.com/embed/P-aAcfe-SbMActual comparison
url: https://www.youtube.com/watch?v=P-aAcfe-SbM&t=327s
src in: https://www.youtube-nocookie.com/embed/P-aAcfe-SbM?start=327
src gen: https://www.youtube-nocookie.com/embed/P-aAcfe-SbM
Say no to orange skin
Many editing techniques and the use of presets will end up changing the hue to skin tones. This includes darker skin color too.
For lighter skin tones, I find that there are underlying hues of either red or orange in the skin tones. With darker skin, I find that the underlying tones are closer to orange.
The last thing you want when you’re editing portraits is to make the skin tones look unnatural – which is sadly a big editing fad of today.
But, this can easily be fixed in Lightroom with a few tweaks.
In this tutorial, I will show you how to edit dark skin in Lightroom and compensate for any skin color changes when presets or hand edits are applied.
Step 1: apply your base edits
It doesn’t matter what skin tone that I am editing, I always start off my editing process by applying a preset (or presets).
Then I like to move onto fixing white balance, exposure, and apply sharpening.
Once this is all said and done, now you have a good base to work with.
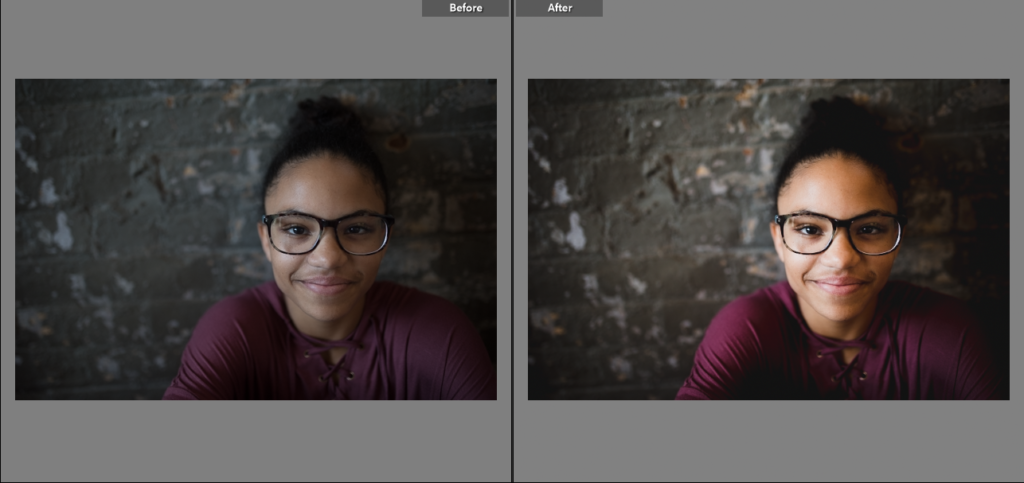
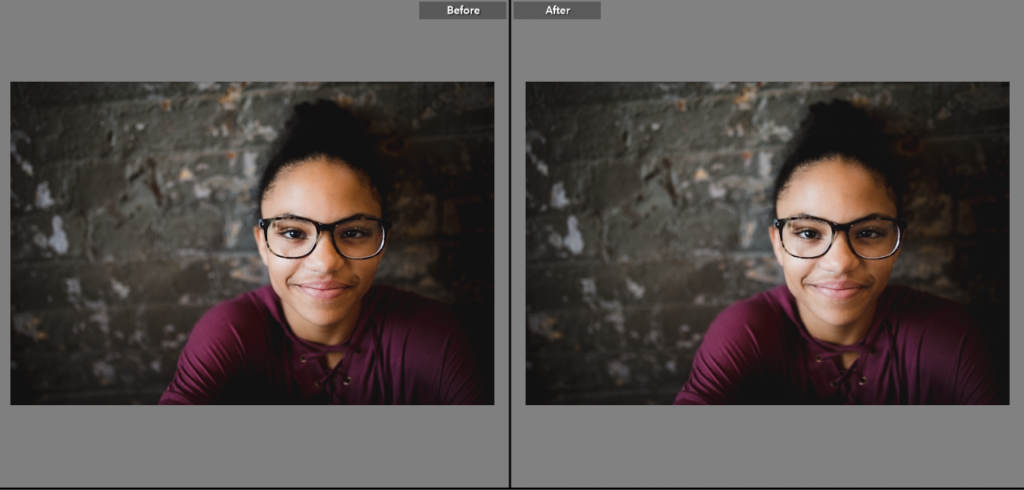
For this photo, I used Dazzlin’ from my Life in Color presets. I also increased the warmth to remove the blueish tones from the background.
As you can see, my subject’s face turned slightly orange when the basic adjustments were applied, so that needs to be corrected.
Step 2: adjust color with the HSL panel
Sometimes using presets can change the look of colors in the photo, so turning to the HSL panel can be an easy way of offset these changes.
The HSL panel in Lightroom stands for Hue, Saturation, Luminance.
The hue will change the look of the actual color. You can turn blues more purple, greens more yellow, and so on. This can come in handy when certain colors in the photo are making the skin tones appear less natural.
Saturation can be used in this instance if you want to take out some of the color. I suggest doing saturation as a last resort, or simply using it very slightly so that the skin tones don’t look dull and muted.
Luminance makes changes to how much light is present in a certain color. You can make certain colors seem lighter or darker when you adjust this. I like to add a bit more luminance to certain colors when adjusting skin tones as it can make for creamier looking skin.
If you see underlying tones of orange or redness in the skin, then move the orange and red sliders under saturation.
The only drawback about using the sliders to adjust colors is that it will adjust ALL of the colors in the photo, and not just in the skin tones. So, if you are trying to reduce orange and your subject is wearing an orange shirt, then you can expect their clothes to be color adjusted as well.
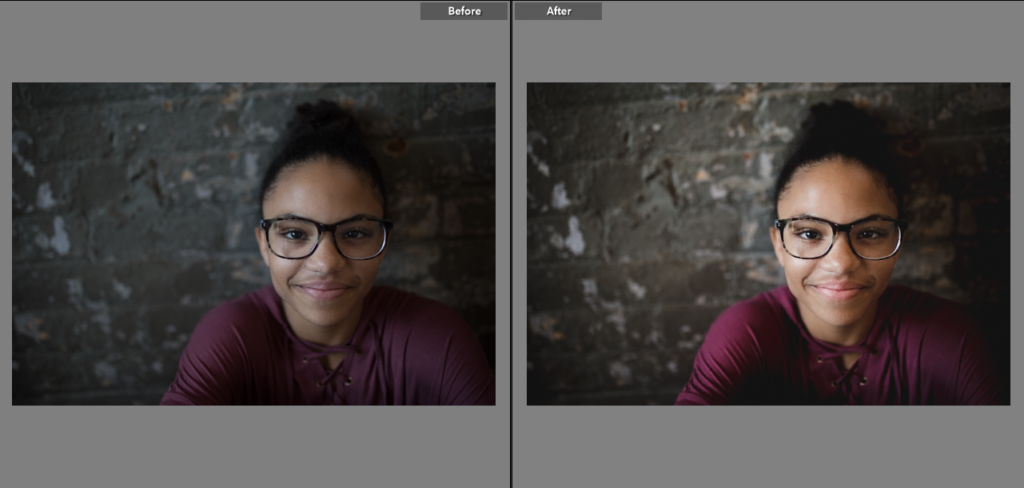
In this case, I decreased saturation and luminance in the HSL panel. This helped reduce the orange color cast and brought back her natural, brown skin tone.
Step 3: Adjust dark skin tones with brushes
If the HSL panel doesn’t give you the look you desire, the brush tool will work even better.
With brushes, you can selectively choose WHERE your edits are going to be applied. This makes it the perfect tool for editing skin tones alone without adjusting anything else in your photo.
For the most part, I usually just skip the HSL panel and come straight to the brush tool. This way, I don’t have to worry about all of the colors in my photo being adjusted and can spot edit better.
Brushes give you more flexibility and you can focus on precise areas of your photos to edit, especially when editing dark skin tones in Lightroom.
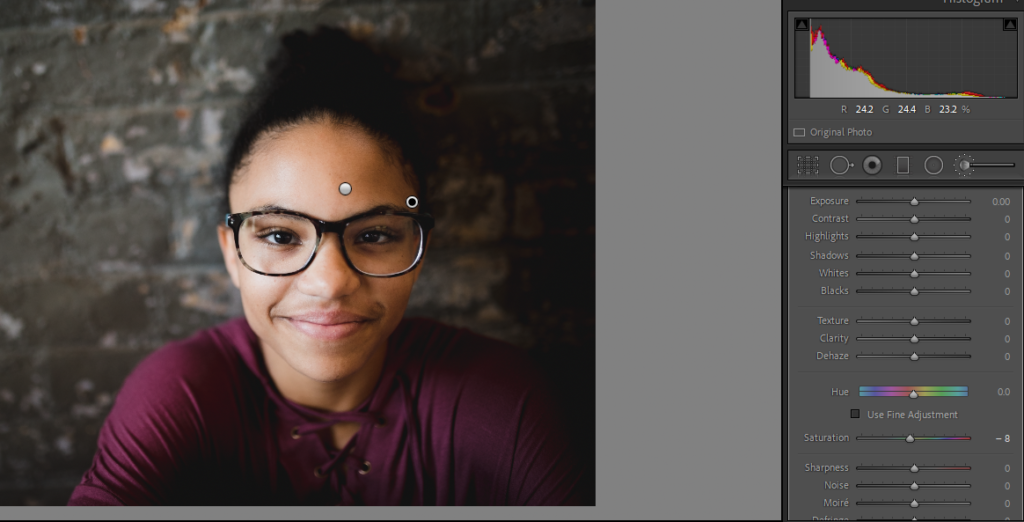
After you’ve selected the brush tool, move your saturation slider down enough to take out some of the color in the skin tones, but being careful of not going overboard.
As you can see, not a lot of desaturation is needed to take out the majority of the orange color tone.
It might not seem like a huge difference on screen, but you will be glad that you removed that slight orange tint when you go to print your photos.
Now, it’s your turn to edit dark skin like a pro!
You don’t have to compromise beautiful skin tones when editing in Lightroom or using presets. Keep these tips in mind when you go to edit darker skin and your photos will turn out beautifully!
If you found this tutorial helpful, here are some other Lightroom resources that you might enjoy:
New to Lightroom presets? Get started with this step-by-step guide and download a FREE starter pack.
What’s your editing style? Here are 5 Lightroom editing styles that you can easily replicate.
Getting started with Lightroom: These are the best import settings that you should be choosing.


be the first to comment