

One way to set yourself apart from the other photographers around you is by learning how to take stunning portraits.
While words like “stunning”, “creative”, and “impressive” photos are completely subjective, there’s no doubt that mixing up your skills will produce different results.
When you can add variety to your collection of photos, it will only help your work stand out more.
Why creativity gives you an edge
Anyone can learn how to take a photo with decent light and smiling straight at the camera. But, it takes skill & attention to detail to take photos that evoke an emotional response in the viewer.
When you can take photos more creatively, then you will have an easier time impressing your audience (and most importantly, your clients).
Looking straight on with smiling faces might be nice, but there’s nothing original about it.
When you can learn how to take stunning portraits, this instantly gives you an edge and a way to stand out from other photographers around you.
Not only that, soon enough people will start to recognize your work – which is a great way for credibility and brand awareness.
Taking stunning portraits doesn’t need to be hard
Even if anyone can take a simple photo, taking stunning, creative photos doesn’t need to be hard. You just need to keep a few things in mind.
When you’re aiming to become a better photographer, then you will have to start thinking outside the box and start challenging yourself to try new things.
Let’s go over 5 ways to help you take stunning portraits that will impress your clients.

Mix up your lenses
If you’re always taking photos with the same lens at the same focal length for every photo, then things might start to look a bit – well – boring.
An easy way to take more stunning portraits and be more creative with your work is by utilizing various lenses throughout a photo session.
This will not only add variety to your collection of photos, but will diversify your entire portfolio and create different looks with your photos.
What if you only have one lens?
Buying or renting more lenses might not be in the budget, and I totally get that. But, you CAN become more creative with how you use the lens that you have.
I won’t lie here. I tend to favor my beloved 50mm lens the most, especially when I am taking outdoor portraits.
It’s great for close ups, candids, and pretty much everything in between. So, how I make it work to add variety to my photo sessions is by utilizing different angles and distance between me and my subjects.
If you only have one lens, then you can aim to do the same.

Try out different angles
Shooting from various angles for one location/spot/pose will not only give you more out of that single setup, but it will also add more variety to your sessions.
Shoot from high, far back, through a bush, or any which way to help add a little flavor to your photos.
This is especially important if you’re shooting with one lens. It’s a super easy way to help your work stand out and take more stunning portraits.
And isn’t that the goal here?
Play with light
Now comes the fun part, LIGHT!
Myself and just about any seasoned photographer would probably argue that light is THE MOST important aspect of taking beautiful photos, and stunning portraits for that matter.
In short: if you have good light, then you can produce great images. If you are working with poor light, then I think you can guess what kind of quality your images will have.
Depending on the time of day and your location, you will have to work with the light in the area to produce the best photos.

Photo taken at sunset in the winter. The sun illuminated the hair & created a dramatic effect.
If you’re indoors, you can play with window light to create a dramatic moody look or a light & airy look.
If you’re outside close to sunset, you can take advantage of the soft, golden glow of the sun.
And if you happen to be out on a sunny day, you can find some shade from trees and buildings to block out the intense light to create a more pleasing effect.
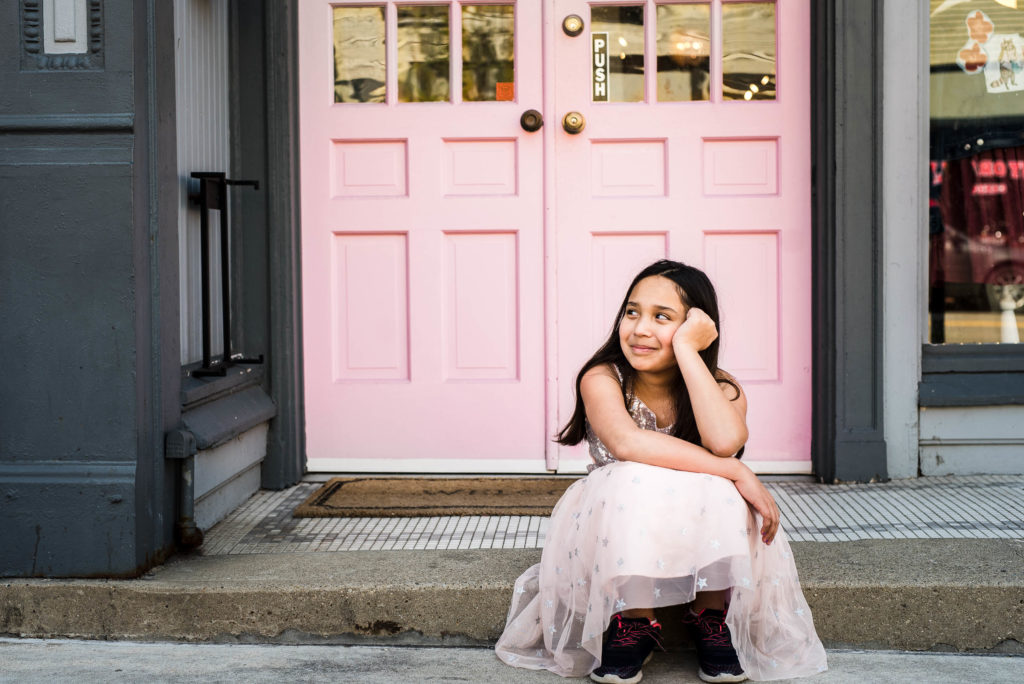
Photo taken on a sunny day during high noon. We found shade from some buildings to create a more even light source & to avoid harsh shadows on the skin.
Your light source will either be your biggest enemy or your best friend, so it’s the MOST IMPORTANT thing to learn about photography. Especially if you want to take & make stunning portraits that will impress your clients.
Learn light like the back of your hand and it’s a fail-safe recipe for stunning portraits.
Take detail shots that tell a story
Another great way to take stunning portraits that will impress your clients is by adding detail shots that tell a story.
Instead of just showing 1 photo of the scene, why not close in on the action and tell a better story with more details?
My favorite way of doing this is by thinking of a story and how you want to tell it. Each story has a beginning, a middle, and an end, so it’s crucial to think of your story’s components while taking the photos. You are the visionary AND the maker, so have fun with it!

For instance, this mini session was fun for this very reason.
Instead of just showing the backed up scene of the washtub with a cute baby plopped inside, I had the opportunity to take it a step further and tell a better story.

Adding in the playtime and changing my angle and positioning, I was able to add more variety to the photo collection itself AND tell a better story.

Once playtime was over, I wanted to be sure to capture the action shot of that. There’s a sweet innocence of what’s going on in this photo that helps tell the story even more.
First, it started with a smiling baby in a tub of bubbles. Then, it led to playtime and splashing. The story ends when the baby has had enough and no longer shows interest in the bubbles.
Of course your stories can be as complex or as simple as you’d like. But, adding in a variety of storytelling images will keep your viewer’s attention longer and impress your clients with the end results.
Be more creative with your editing
This is the final piece that makes your photograph, so it’s something to not overlook.
It’s the way that you edit your photos.
If you are drawn to moody shadows and muted tones, then it doesn’t make sense to try a light & airy look when it comes to editing your photos.
Depending on the light that you captured in your photos, you can enhance it even further with your editing to have a consistent style. This is another reason why knowing how to use light is so important – it helps you create a consistent look to your photos!

Using a single Lightroom preset collection helped keep these photos consistent with their style and creates a unique editing look without overdoing it!
You can do the same with the knowledge you have of your editing program, or you can take a simple shortcut by using Lightroom presets.
If you crave a colorful look with creamy skin tones, then choosing presets to enhance that look will be your ticket to editing success.
Perhaps you like a more subtle, timeless look with soft greens with slightly de-saturated colors. Then choosing presets to reflect that will help you create that style.
Not sure what your editing style is? There are so many ways that you can edit a photo, but here are a few styles you can get started with now.
Want to become more creative with your editing?
When I first started editing my photos, I honestly knew NOTHING about the process.
My knowledge consisted of levels, curves, and simple white balance adjustments that I was taught in photography school. I really had no knowledge of editing in a way that would help my photos stand out and look professional.
Over time, I finally learned A LOT about editing and how to create a consistent editing look to my photos. But, it came at the cost of years of tinkering and toying around (not to mention many late nights pounding back coffee to stay awake).
I share a lot of Lightroom editing tutorials on my blog – things that have helped me cut down on my editing time AND create beautiful images. Stick around to see what you can find for yourself.
If you found these tips helpful, here are some more resources that you might enjoy:
New to Lightroom presets? Get started with this step-by-step guide and download this FREE starter pack.
What’s your editing style? Here are 5 Lightroom editing styles that you can easily replicate.
Take better portraits & learn how to get creamy skin tones.
RAW Vs. JPEG, what’s the big deal with RAW photos?


be the first to comment