

There’s many reasons why you’d want to batch edit in Lightroom, but the most exciting being speed.
I remember when I was first learning how to edit photos. It would literally take me HOURS to edit just a small gallery of images to deliver to my new photography clients. I’d spend so much time editing that I didn’t have time for much else to grow my business!
Instead of spending that time editing, I could have been working on my branding, networking, marketing, and anything that brought in more business. Because when it really boils down to it, editing is a time-suck.
Even if you don’t have a photography business and you have extra time to edit your photos, it still doesn’t have to be a long, drawn-out process.
That’s what makes batch editing so awesome.
When you know how to batch edit in Lightroom effectively, you will be able to edit your photos faster and save so much time in the long run.
You can edit one photo and then apply those adjustments to other photos with similar backgrounds and lighting.
When I discovered how to take better photos in my camera and become more consistent with my shooting, batch editing became a breeze. And soon enough, I was able to edit my photo sessions in less than an hour.
Now, it takes me about 45 minutes from start to finish to edit a photo session for my client and about 15 minutes for a mini session.
READ NEXT: How to edit mini sessions faster
But, you don’t want to rush through your editing either.
As much as I love batch editing, it isn’t a lazy fix. I only use it in cases when my in-camera photos are perfect (or near perfect).
This takes time and practice, but batch editing has helped breeze through my editing when my before photos don’t need “fixing.” When my photos need a little more TLC, it makes batch editing a bit more tricky.
The first thing you want to do when it comes to batch editing in Lightroom is organize your photos.
When you have a series of photos, make sure they are all in line and organized by their location/background and lighting situation.
Many times during a photo session, my backgrounds and lighting change. So making sure that my photos are organized in the right order in Lightroom makes batch editing easier and even faster.
Just click on a photo preview in the develop or library module and you can move them around in a different order (if needed).
Apply your edits
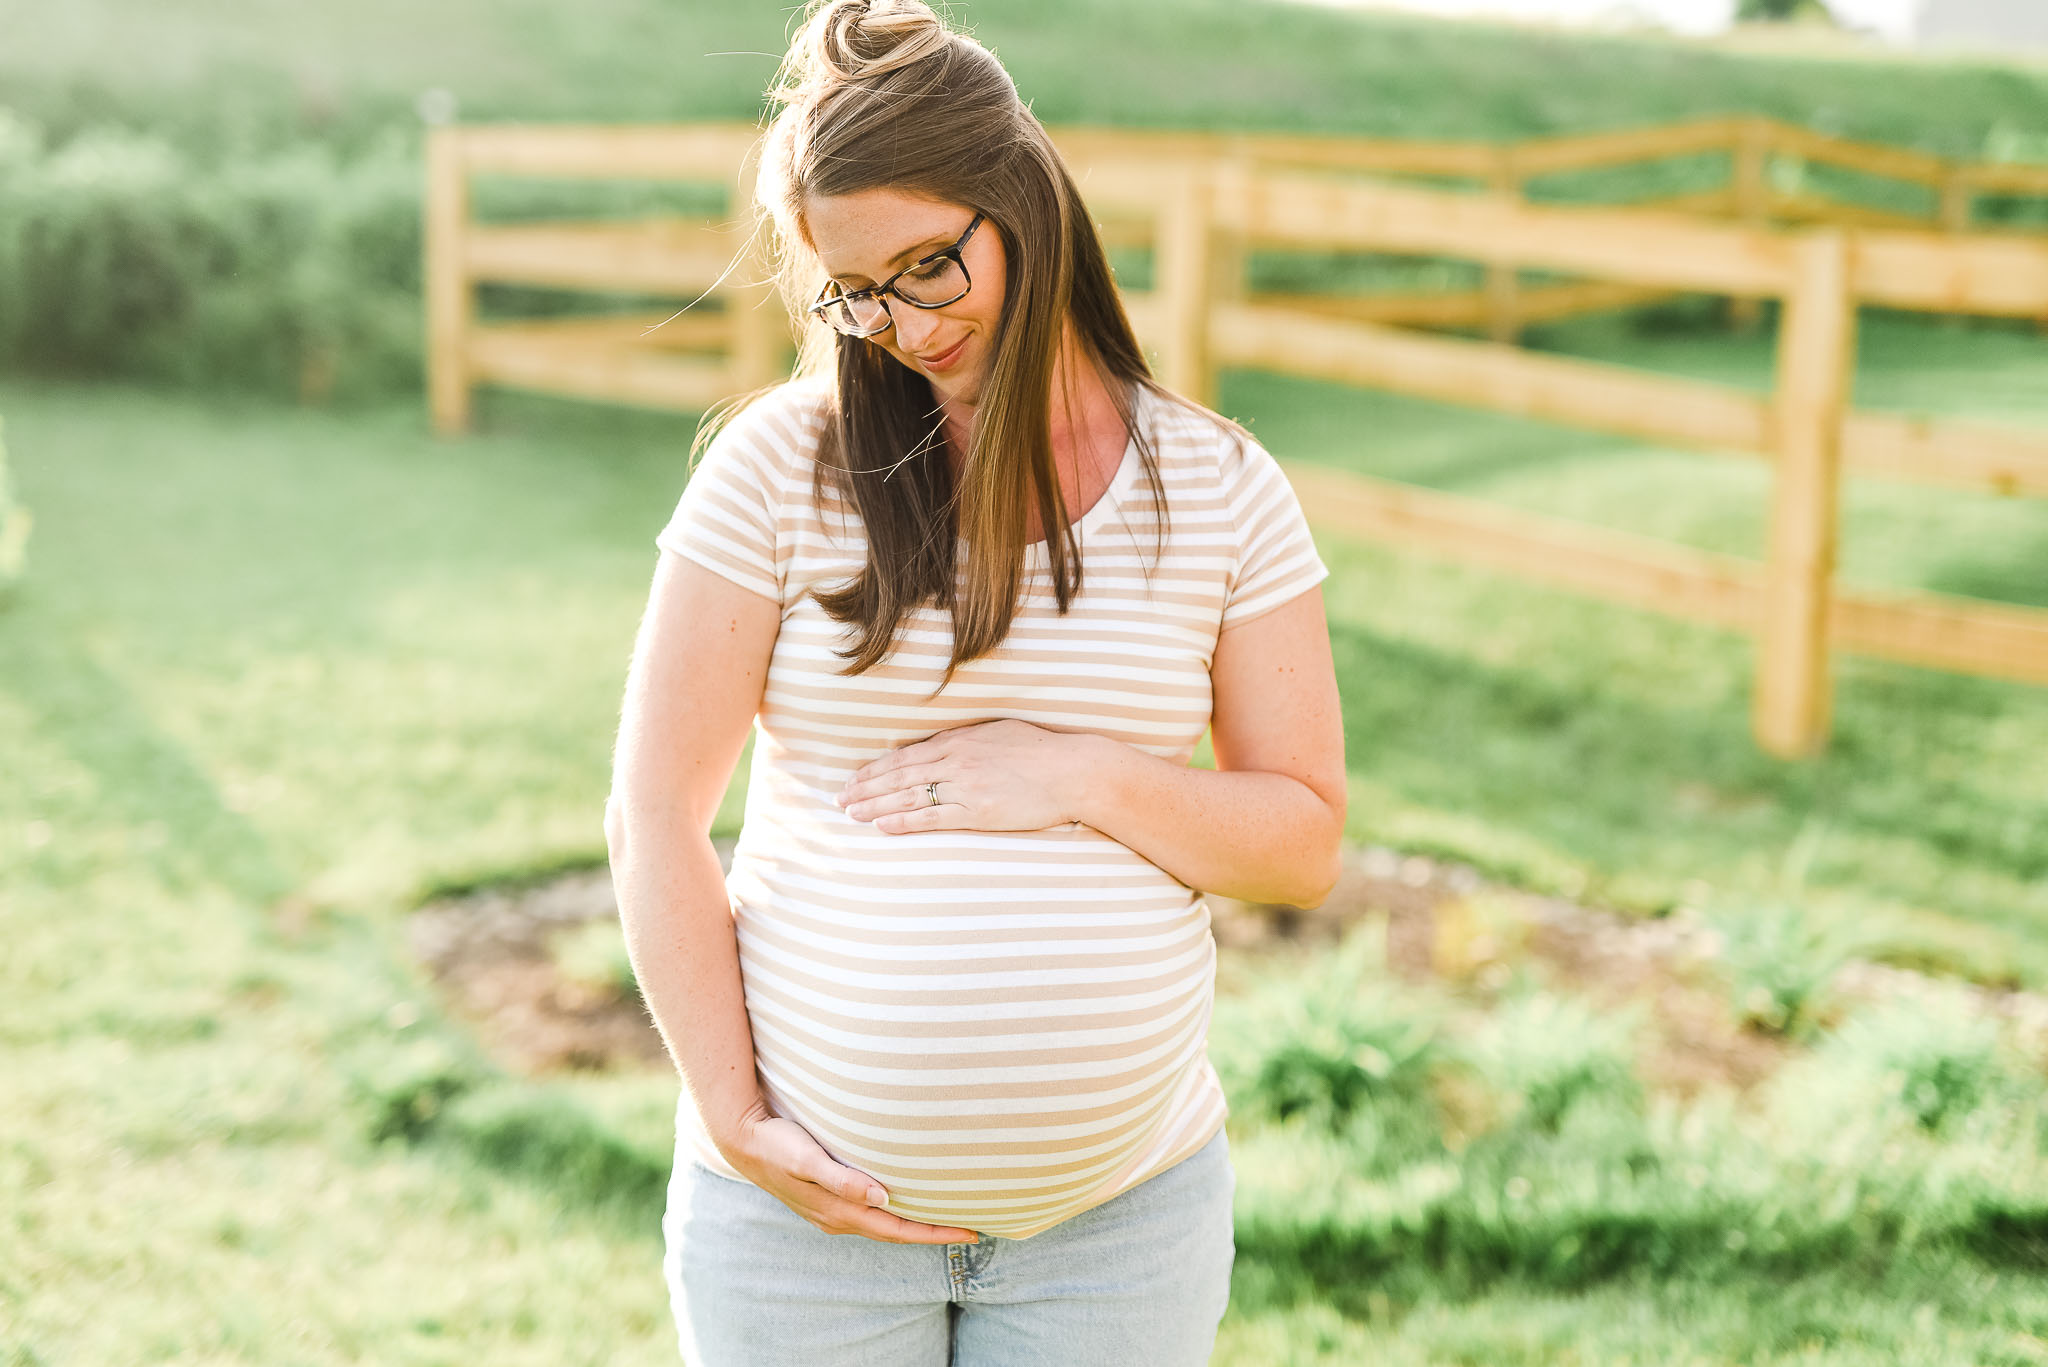
First you will need to edit one photo with your base edits so that you can apply the same settings to your other photos.
Using presets really speeds up the process even more.
Here I used a preset from the Storyteller preset collection. I also slightly adjusted the white balance and exposure to brighten and warm it up a bit.
Now that my first photo has been edited the way that I want, I can apply these same changes to more photos – as many as I want!
Apply the settings to other photos
Now comes the exciting part – batch editing!
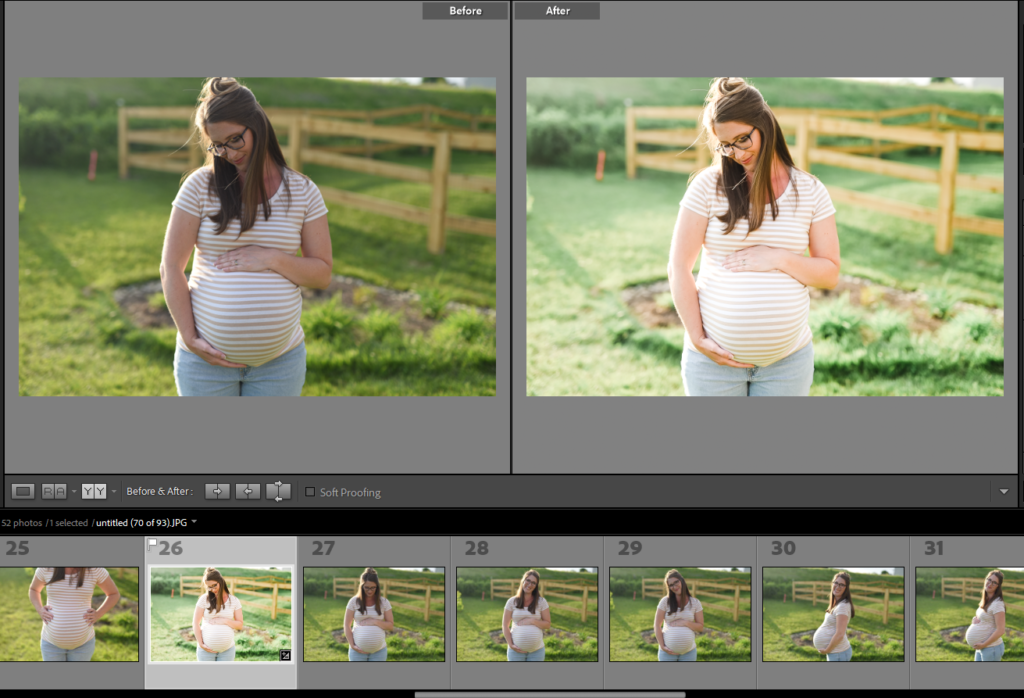
Make sure that the photo that you just edited is highlighted and then hold down ctrl/command & then click on the other photos you want to apply the edits to.
Sync settings to other photos in Lightroom
With the edited photo still highlighted (it will be the brightest out of all of them), click on the sync button on the bottom of the right hand column in the develop module.
A pop up window will show up where you’ll be able to choose which settings that you want to apply to the other photos.
In this case, I want everything with the exception of masking, brushes, and cropping – basically anything that won’t transfer well to another photo.
Once you have chosen your sync settings, click on the synchronize button to apply the edits to the other selected photos.
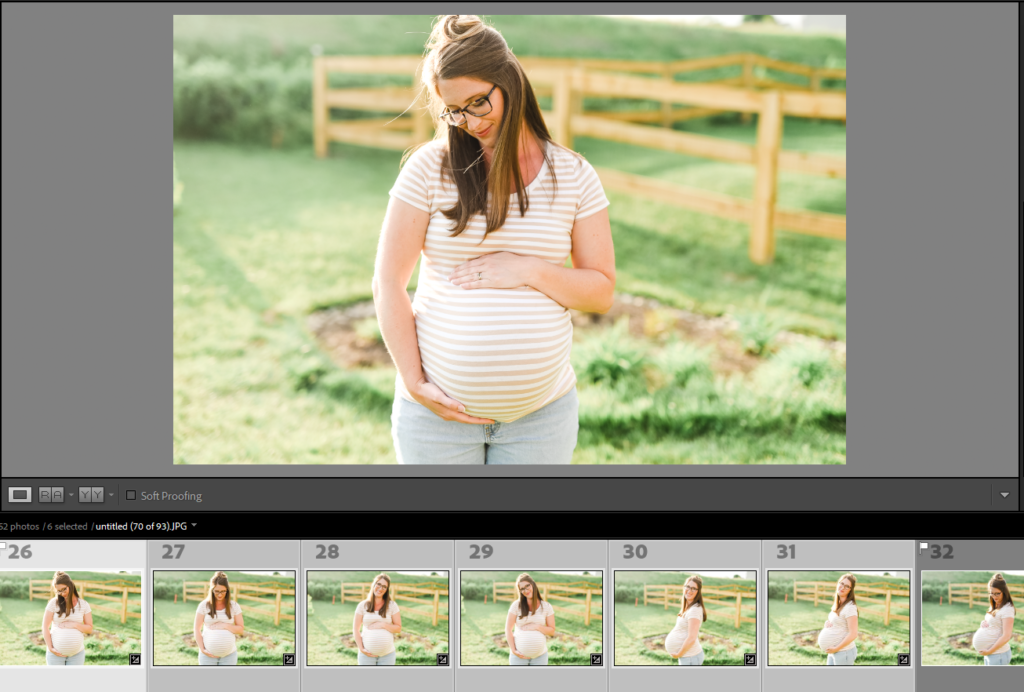
Now you can see all of the photos in my filmstrip have been edited!
All of the adjustments have been made to the photos that I selected and now I can go through them one by one to see if they need any tweaking.
Making adjustments after batch editing
Just because you have applied settings to other photos doesn’t mean it’s a done deal.
You can go back to re-edit or even remove the sync settings completely.
To remove all of the settings, scroll down to your history tab and select back to where it was BEFORE you applied the settings.
You can also make adjustments to your photos after you’ve synced them. Many times I will go back and adjust exposure, white balance, and sometimes use brushes/spot removal on individual photos. But, overall, batch editing really speeds up the process!
Still have questions about batch editing?
Check out the video tutorial to see how to batch edit in Lightroom.
More details about the creation of these photos:
Camera – Nikon D750
Lens – Sigma ART 50mm 1.4
Time of day: Just before sunset
Presets – Storyteller (ST3)
If you enjoyed this Lightroom tutorial, you might also like:
Learn how to retouch portraits: How to whiten teeth with Lightroom brushes
New to Lightroom presets? Get started with this step-by-step guide and download this FREE starter pack.
What’s your editing style? Here are 5 Lightroom editing styles that you can easily replicate.
Getting started with Lightroom: These are the best import settings that you should be choosing.
Want to take your Lightroom skills to the next level the EASY way???
Editing with ease is a complete learning experience if you’re dying to know how to to edit in less time so that you can focus on other things in your life (and your business if you have one!).


be the first to comment