


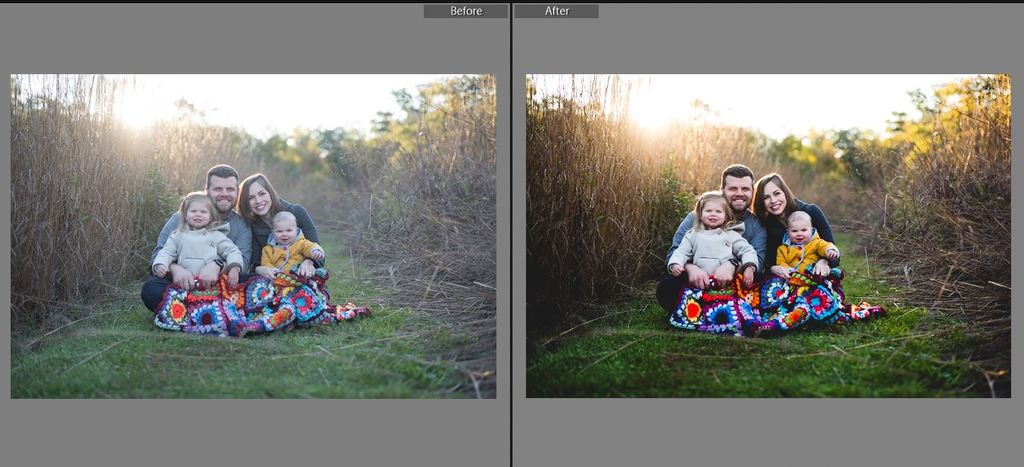
WASHED OUT PHOTOS: IF YOU LOVE BACKLIGHTING, THEN YOU KNOW THIS CAN OFTEN BE A STRUGGLE WITH CAMERA ANGLES.
When you are lighting your subject from behind, depending on the time of day, you will most likely create a hazy, flat, and washed-out image.
I personally LOVE the hazy, sun-flare look, but sometimes the colors are very muted and lacking in vibrancy.
It’s worth noting that a good photo starts in the camera with good lighting, but sometimes (especially when working with wiggly little ones), perfection isn’t always an option.
That’s when editing skills come in to save the day!
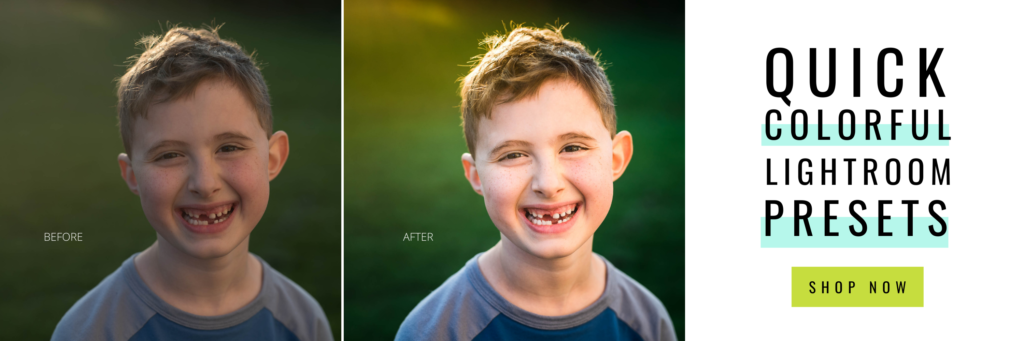
With the help of Lightroom Presets and a few hand edits, you can easily turn muted photos into something bursting with color!
LET’S WALK THROUGH THE STEPS I TAKE TO FIX & ENHANCE BACKLIT PHOTOS TO FIX THE WASHED OUT LOOK.
1. APPLY PRESETS & BASE EDITS
I applied ‘over the top’ & ‘define’ presets from our Life in Color Lightroom preset collection, but you can use the tone curve or your own workflow and base edits to do the same.
Use the basic panel to adjust blacks, whites, white balance, and saturation.
Click here to learn how to use the tone curve to edit better in Lightroom.
This helped set the base of the edit with just 2 clicks.
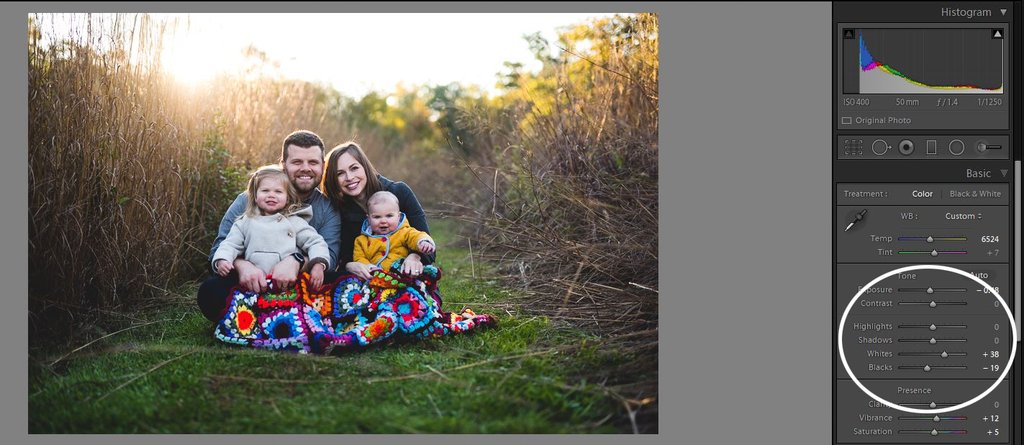
2. PRESET ADJUSTMENTS
Next, I adjusted the blacks, whites, and exposure in the basic panel to make subtle changes to the overall look of the edit.
Lightroom Presets aren’t always a 1-click wonder, so knowing your way around Lightroom can make all the difference in your editing!
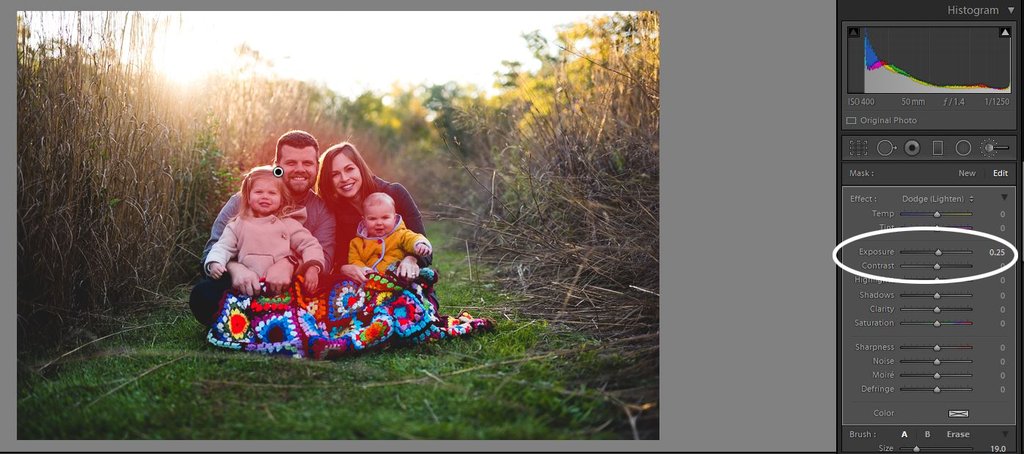
3. BRUSHES
Next, I opened the brush tool and applied a soft dodge brush over my subjects to subtly brighten their faces without overexposing their skin.
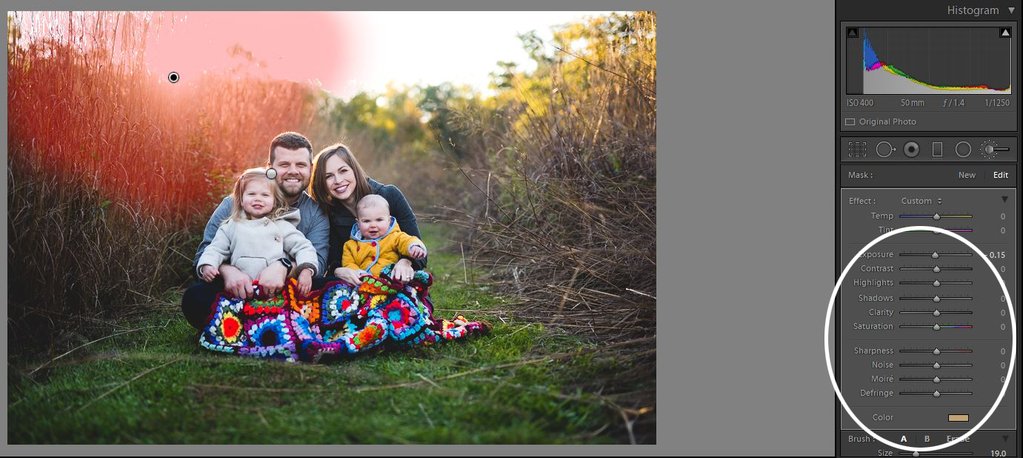
Next, I enhanced the color of the sunset behind them with a colorized sunset brush; you can see the brush settings in the image below.
You can view a demo of an edit using this brush here+ download your FREE brush here.
4. FINAL TOUCHEs
After I applied my brushes, I went back to the basic panel and adjusted the temperature to warm up the photo just slightly and also adjusted my exposure to make it perfect.
I like to make exposure adjustments at the end of my editing to determine the final look.
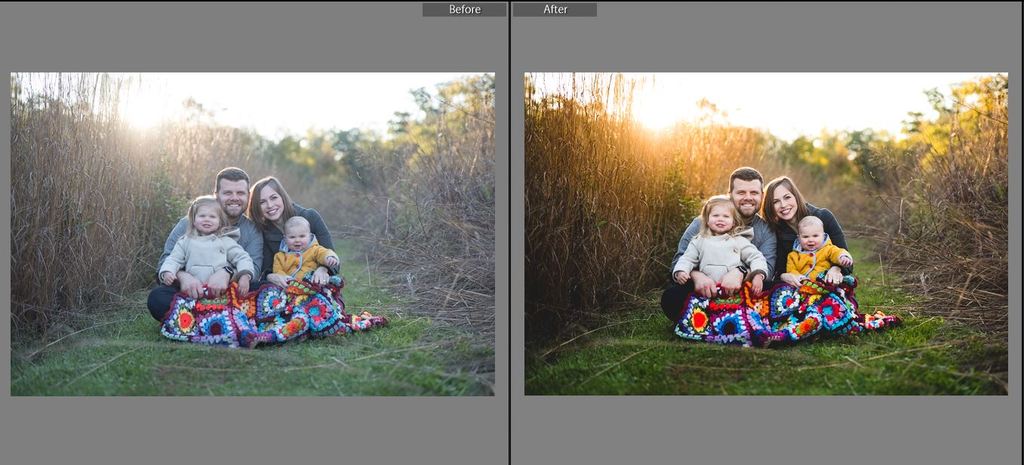
You can see how quick and easy it can be to turn a dull, washed-out image into something much more lively and fun just with presets and brushes!
Want to take your Lightroom skills to the next level the EASY way???
Editing with ease is a complete learning experience that will teach you how to to edit in less time so that you can focus on other things in your life.
Or just grab one of my preset collections to instantly transform your photos into something that you love!
If you enjoyed this post, you might also like:
4 ways to get a blurry background in your photos
Photo editing tips for beginners
moody portraits: 4 ways to easily take them indoors
Top 5 Lightroom Editing Styles you can easily replicate (with before & afters)


be the first to comment